With QS Live, a Revit add-in designed for targeted error detection, you can isolate faulty elements and correct them immediately. This prevents lengthy workflows that typically result from the high level of coordination required.
When used regularly, the tool helps identify and eliminate modeling errors early in the planning process. This enables consistent quality assurance within a single tool.
The time required and the risk of data loss from exporting and importing data to and from various tools are eliminated—you find and correct errors in the only place they belong: your model!
To load this content, you need to allow the YouTube service.
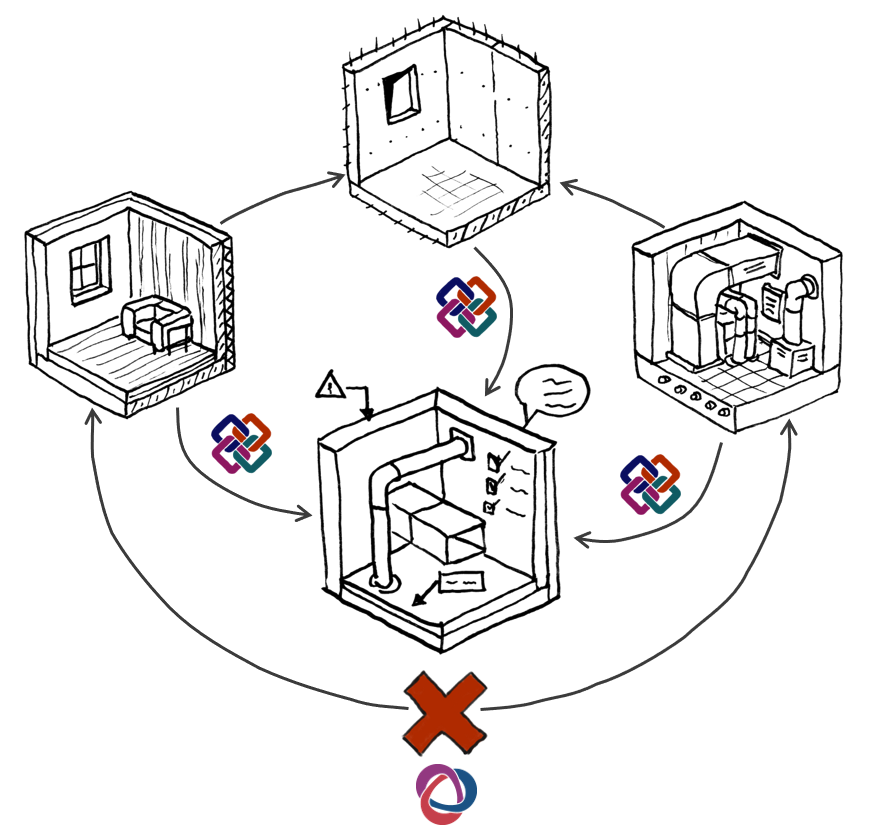
Quality assurance in BIM can involve lengthy processes: Especially when external review tools such as Navisworks or Solibri are used for checking, communicating the errors found there can be very time-consuming: The model must first be exported and then checked; subsequently, the errors found must be imported back into Revit in the form of BCF comments.
Critical errors, such as duplicate or overlapping elements, can be identified very quickly and easily in Revit—but Revit lacks the tools to display these errors quickly and easily.
This is exactly where QS-Live comes in: The most critical errors are detected directly in Revit and listed in a small, dockable window. From this list, the affected elements can be selected directly and displayed in isolation.
- Identify the most critical errors in seconds
- No tedious exports or BCF workflows
- Quickly and easily identify and correct problems before they affect the rest of the design process
- You work directly in Revit: No data loss due to export/import, no BCF workflows required
- Run all 7 tests or just the ones you want
- Direct links to relevant BIMpedia articles are available
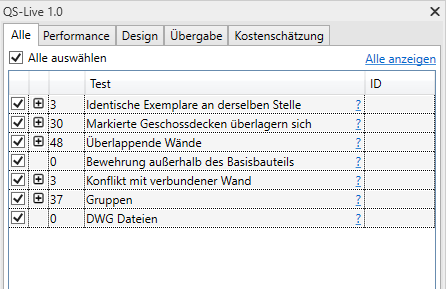
Currently, there are seven validation rules for particularly problematic errors in Revit.
- Perform all functions in the respective view directly in Revit
- Structured list of errors found
Duplicate elements
This check is based on the Revit warning type: "Identical instances exist in the same location." These are counted twice in schedules!
Overlapping floor slabs
This check is based on the Revit warning type: Marked floor slabs overlap!
Overlapping walls
This check is based on the Revit warning type: The highlighted walls overlap. If Revit detects room boundaries, one of these walls may be ignored. Use the geometry clipping commands to have one wall wrap around the other.
Reinforcement outside the base component
This check is based on the Revit warning type: Reinforcement is placed entirely outside the associated base member.
Conflict with the adjacent wall
This check is based on the Revit warning type: "Inserted element causes a conflict with the connected wall." A large number of such warnings can affect model performance.
Groups
This check displays all groups—Detail and Model—in the current view. This check is included because of the performance issues that can arise in a project when groups are not properly modeled and organized.
DWG files
This check makes it easier to locate DWG files in a view. It distinguishes between linked and imported DWGs and indicates whether a DWG is visible in the 3D view.
Here you'll learn how to use the tool: How do you open it, and how do the menu and features work?
General
The tool is located in the Planning Data ribbon.
Clicking the QS-Live button launches the tool. A dockable window will then appear. Clicking the button again closes the window.
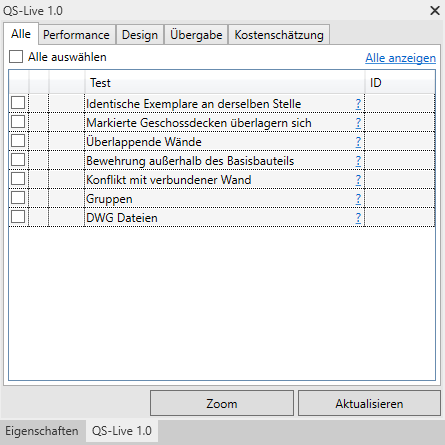
The tool serves as a container for all future tests, which will be organized into 4 categories:
- Performance
- Design
- Handover
- Cost estimate
Start
You have the option to run all the tests—or just the ones you choose. Even if there are a large number of issues in the model, the tool gathers the information quickly.
To view more information about a test, click the question mark next to the test's name. This will open a BIMpedia article with more information on the topic.
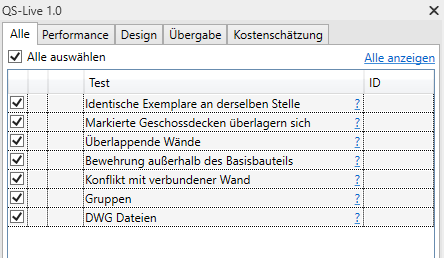
Once you have selected the tests, click "Update" to load the data.
Analysis of the data
Next to the test name, a number appears indicating how many elements were found in this test. Double-clicking the test expands it and displays all relevant elements.
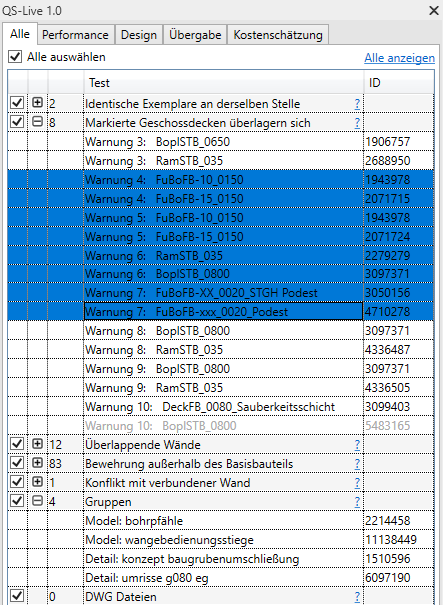
In the first 5 tests, elements are sorted into groups in the same way they are displayed in the Revit warning dialog. Elements that conflict with each other have identical warning numbers.
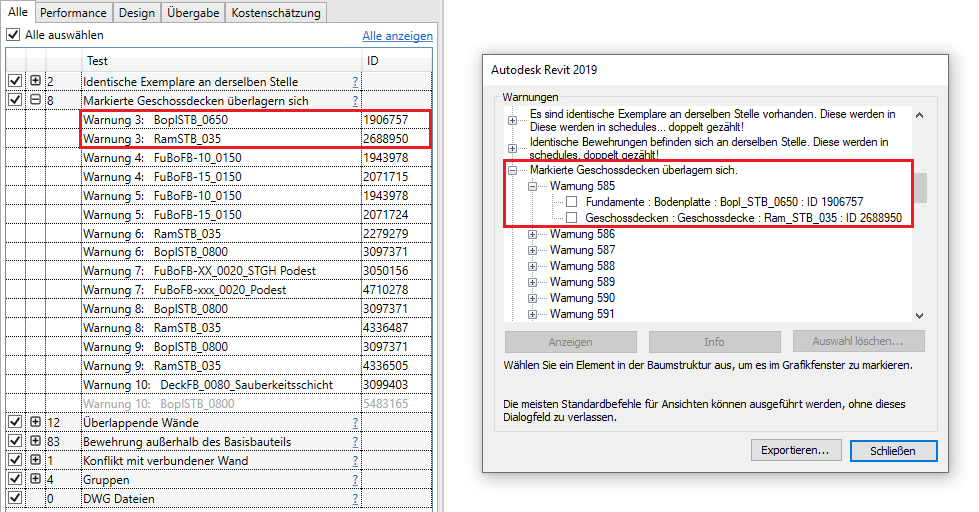
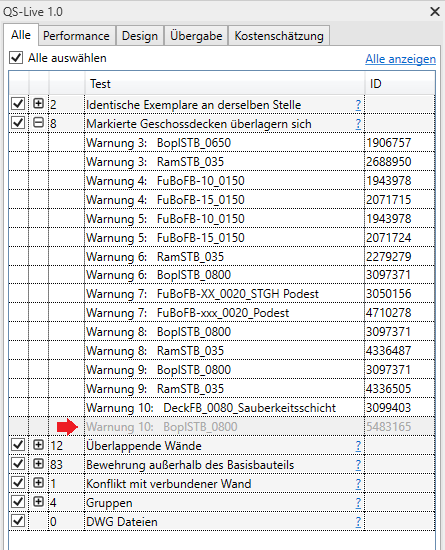
Note: A single warning may contain multiple items. Usually, not all of them are visible in the current view. Those that are not currently visible are displayed in gray. (See image below: Warning 10).
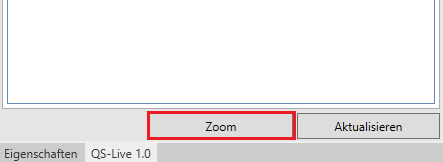
Clicking on an item in the table automatically selects that item in the view. If it is difficult to see, click the zoom button to enlarge the current view to focus on the item.
You can select more than one item by clicking while holding down the Ctrl or Shift key, or simply by clicking and dragging.
Best Practices
This tool is designed to be used on a regular basis. This allows problems to be identified before they become serious.
Finding elements in a view:
The QS-Live Tool works in both the 3D view and the plan view. Elements are easier to locate in the 3D view, but related issues are easier to resolve in the plan view.
It can be difficult to locate elements that are visible in a view but are obscured by other elements. We recommend the following workflow:
- Select multiple items in the QS-Live table using the Ctrl or Shift key.
- Click the "Zoom" button to adjust the current view to the selected elements.
- Isolate the elements using the Revit “Isolate Element” function.
Adjust Zoom – 3D View
When used in 3D view, the zoom function can sometimes change the current view. This is part of how the Revit API works. If this happens, follow this workflow:
- Select multiple elements in the QS-Live table using the Ctrl or Shift key.
- Isolate the elements using Revit’s “Isolate Element” feature.
- Double-click the mouse wheel to adjust the zoom of the elements to fit the screen.
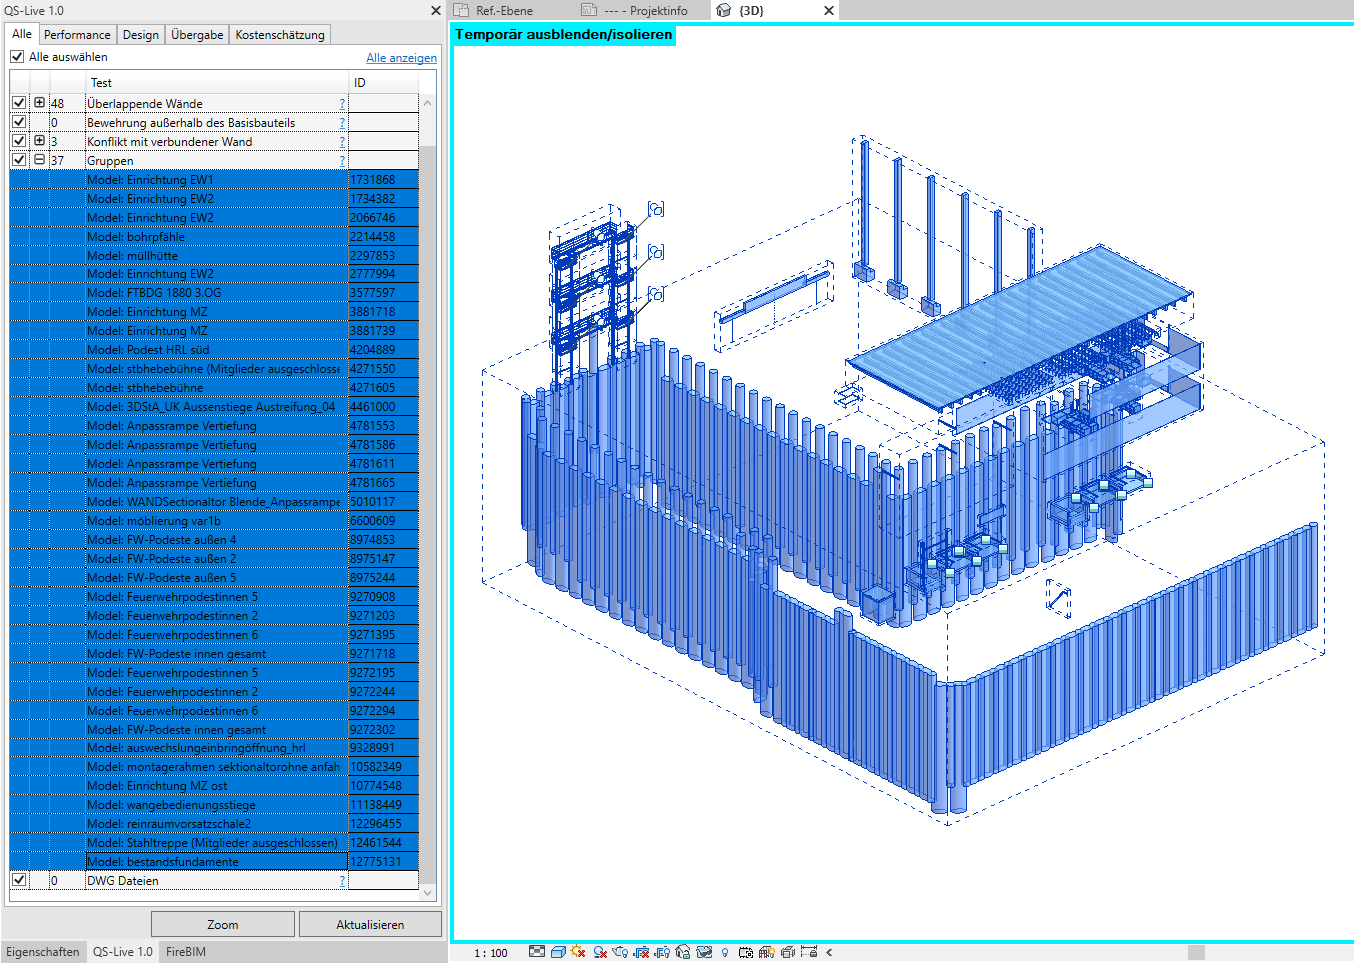
Example: Select all groups in the 3D view.
2.8.0.0
- Revit versions 2026.0 through 2026.4 are now supported.
- Pressing F1 opens the BIMpedia article (tooltip).
The following limitations are currently known and should be taken into account when using this feature.
Areas of expertise
If editing areas are turned off and contain components, those components will not be detected by QS Live. Example: In Revit, the warning view lists all floor slabs that have overlaps. For a clearer overview, QS Live focuses only on the current view and can display only those objects that are located within an open editing area.