"Export Rooms" assists you with a particularly time-consuming step in integrated planning—preparing the architectural model for export to building services and building physics calculation and simulation programs.
This is an essential process, especially when using gbXML as the data format or the GBIS interface—which is commonly used in German-speaking countries—and one that can be very time-consuming and error-prone when done manually.
To load this content, you need to allow the YouTube service.
Preparing rooms from architectural models for transfer to calculation and simulation programs using GBIS or gbXML requires many steps. Manually removing or setting room partition lines, reorganizing and dimensioning rooms, or changing location information (interior/exterior) in building elements such as walls and ceilings involves numerous small-scale steps and takes a great deal of time that is then lacking for the actual calculation and evaluation.

- Significantly accelerated workflow for model preparation for data transfer via GBIS and gbXML
- Rule-based, automatic removal of unnecessary room partition lines
- Filling in missing rooms in individual views and across multiple levels
- Replacement of non-room-bounding elements, e.g., foundation slabs
- Optimization of room heights, e.g., up to the next ceiling
- Identification of problematic rooms that are not completely enclosed by elements
- More time for your actual task of calculation and evaluation
Prepare the rooms
The "Optimize Model" page allows you to automatically optimize architectural models.
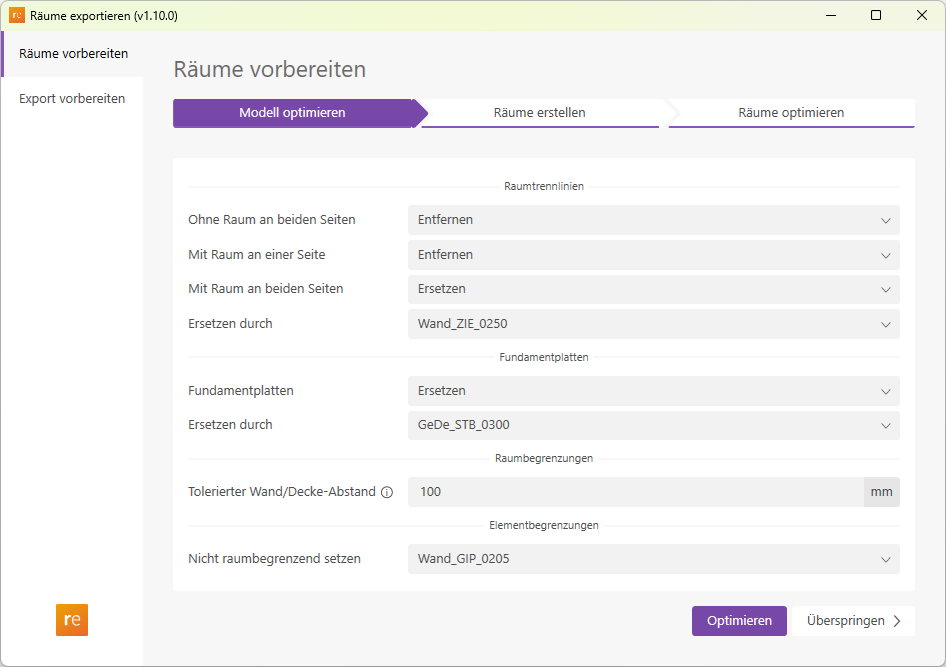
- Room boundary lines
- No room on either side
Removes room boundary lines that do not define a room. This cleans up the model by removing "orphaned" lines that are created when rooms are deleted or moved. - With room on one side
Removes room boundary lines that define a room on only one side. - With room on both sides
Replaces room boundary lines that bound a room on both sides.- Replace with
The family type to be placed in place of the room boundary line.
- Replace with
- No room on either side
- Foundation Slabs
- Replace with
Replaces foundation slabs with other system families, such as floor slabs.
- Replace with
- Room Boundary
- Tolerated wall/ceiling clearance
This function detects whether room-enclosing walls or facades enclose a room to its full height. If a room-enclosing wall is lower than the room itself, the room status is marked with the suffix "Clearance." If a room boundary contains at least one room boundary line, the suffix "Distance" is also added. The suffix "Distance" thus serves as an indication that a room is not completely, or not to its full height, bounded by walls.
- Tolerated wall/ceiling clearance
- Element Boundary
- Set
to "not room-bound" Set any number of system family types to "not room-bound"
- Set
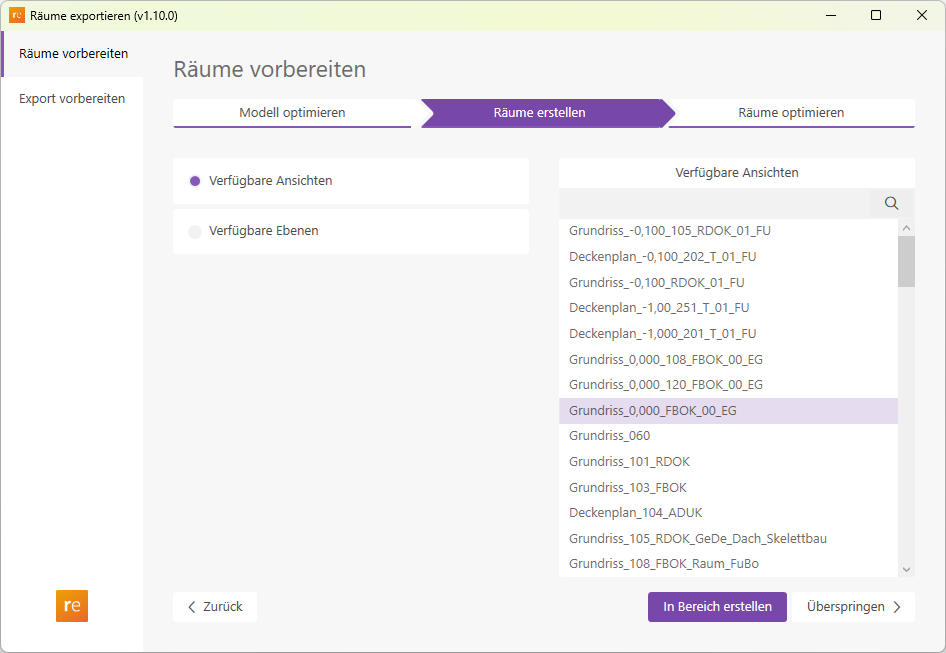
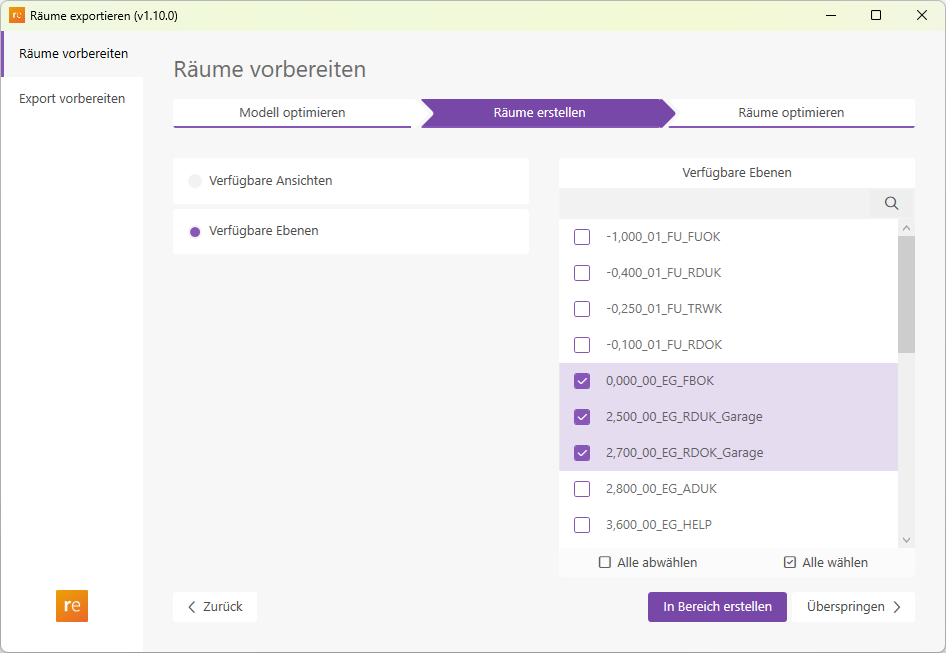
The "Create Rooms" page allows you to create missing rooms. You can create rooms within a specific view, as well as across multiple levels.
In "Available Views" mode, all floor plans and ceiling plans in the model are displayed. The selected view opens automatically, and you can then drag a window to define the area where new rooms are to be created.
In "Available Layers" mode, all layers in the model are displayed. You can select as many layers as you like for creating new rooms. Dragging a window in a floor plan defines the area where new rooms are to be created. To do this, open a suitable floor plan view in which you want to define the area.
The "Optimize Rooms" page allows you to extrude rooms vertically. This enables you to adjust rooms to fit ceilings, floor slabs, and roofs.
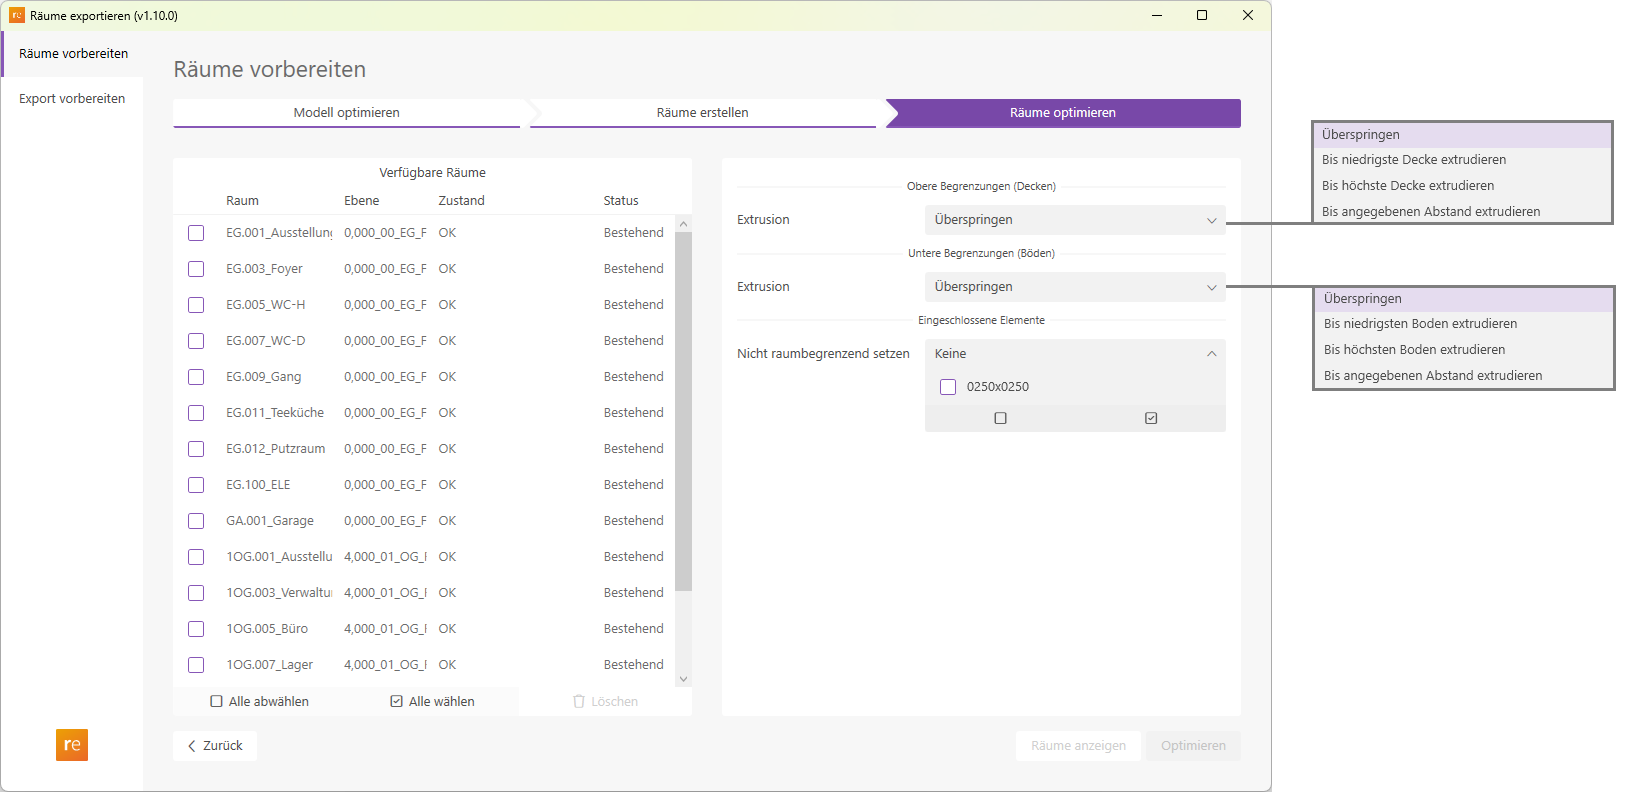
- Available Rooms
Lists all rooms present in the model. In addition to the room name and floor, we also receive information about the condition and status of the rooms.
The condition is displayed as either "OK" or "OK, gap". The suffix "Distance" indicates that a room is not fully enclosed by its boundary walls. This is the case if at least one wall is lower than the room, or if a room is bounded by at least one room partition line.
The status indicates whether the room was just generated using the "Create Room" function or whether it already existed in the model. - Upper Boundaries (Ceilings)
The Extrusion drop-down list offers various options for adjusting the height parameters of a selected room to components in the Ceilings, Floor Slabs, or Roofs categories.- Extrude
to Lowest Ceiling Sets the top edge of the room to the height of the component located closest above the center of the room. The "Top Edge Offset" parameter is adjusted accordingly. - Extrude
to highest deck Sets the top edge of the room to the height of the component located farthest above the center of the room. Here, too, the "Top Edge Offset" parameter is adjusted. - Extrude
to specified distance Similar to "Extrude to lowest floor," but with an additional freely selected distance added.
- Extrude
- Lower Boundaries (Floors)
The Extrusion drop-down list offers various options for adjusting the height parameters of a selected space to components in the Floor Slabs category.- Extrude
to lowest floor Sets the top edge of the room to the height of the component located closest below the center of the room. The "Base Offset" parameter is adjusted accordingly. - Extrude
to highest floor Sets the top edge of the room to the height of the component located farthest below the center of the room. Here, too, the "Base Offset" parameter is adjusted. - Extrude
to specified distance Similar to "Extrude to lowest floor," but with an additional freely selected distance (negative) added.
- Extrude
- Enclosed Elements
In the "Set as non-space-limiting" dropdown list, you can select element types that exist in the model. Elements of these types that are at least partially located within the selected space can be set to "No" for the "Space Limiting" parameter using this function.
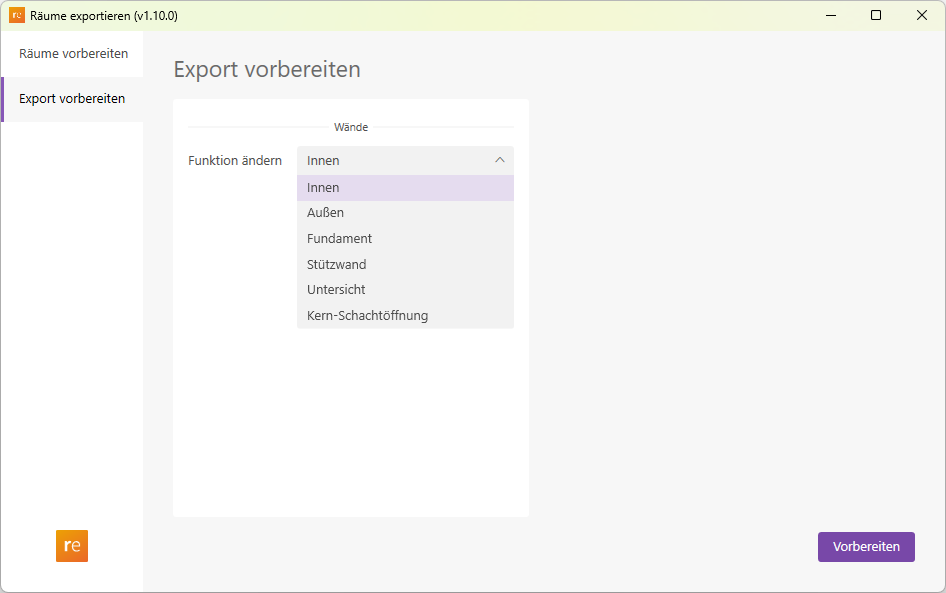
Prepare for export
Here, you can standardize the "Function" type parameter for all wall types throughout the model. This is required for gbXML export to certain thermal calculation programs.
1.10.0.0
- Bug fixed:
- The status of existing rooms on the "Export Rooms" page was not updated correctly.
- Rooms were not sorted correctly. They are now sorted by level.
1.11.0.0
- Revit 2026.0 through 2026.4 is now supported.
- The info icon opens the BIMpedia article.
- Pressing the F1 key opens the BIMpedia article.
If you have any problems or questions, or if you have ideas or suggestions, please feel free to contact our customer service team. We look forward to hearing your suggestions for improvement!