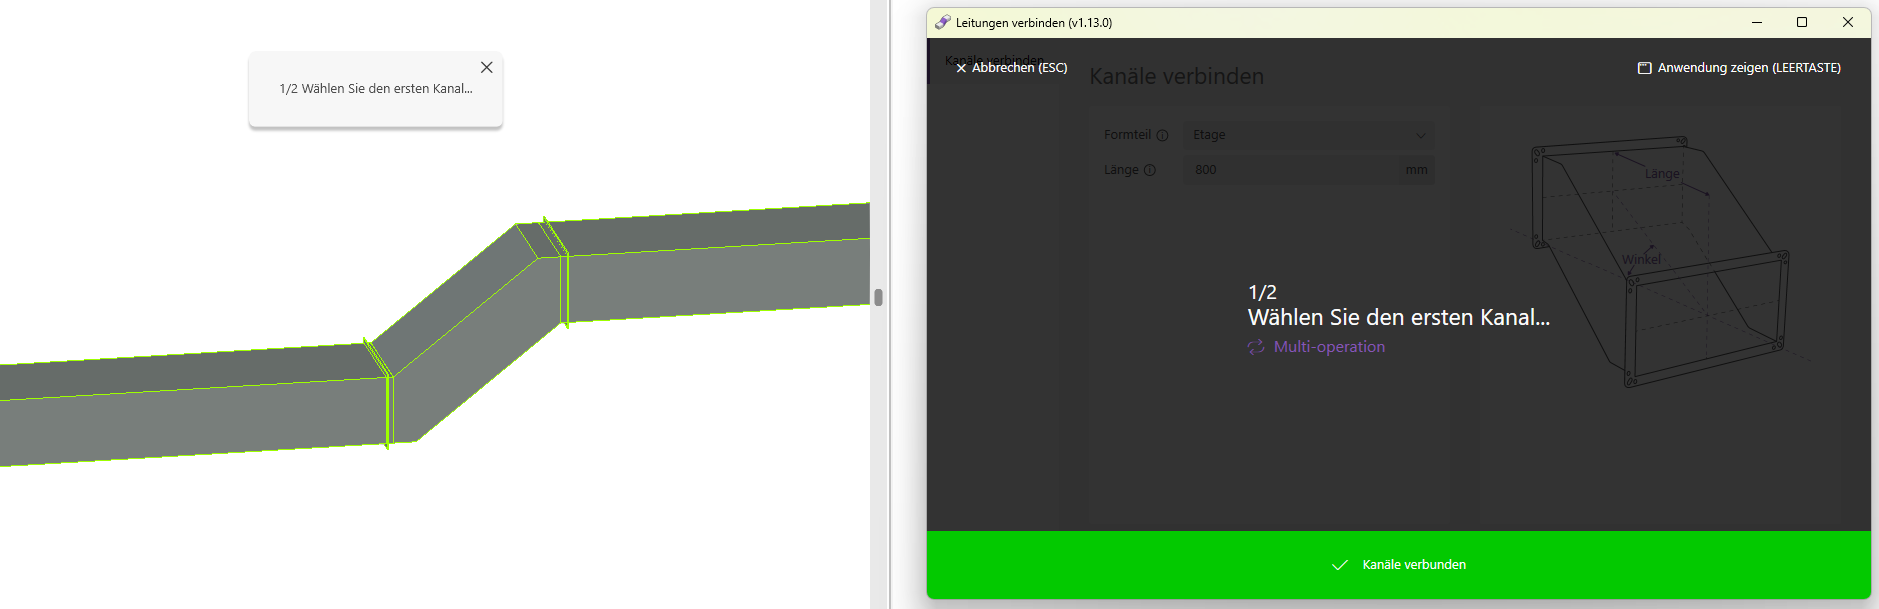
“Connecting Ducts” helps you connect air ducts quickly and precisely by automatically placing the appropriate fittings. Connect ducts at the same level as well as ducts at different heights using the appropriate transition pieces—including changes in cross-section.
Manually connecting ventilation ducts is often time-consuming and prone to errors. Especially when there are changes in height or cross-section, the adjustments required for transition pieces demand a great deal of time and attention.
- Significantly accelerated modeling process
- Intuitive, linear workflow
- Configurable angles and distances
This add-in can be used to create three different molded parts.
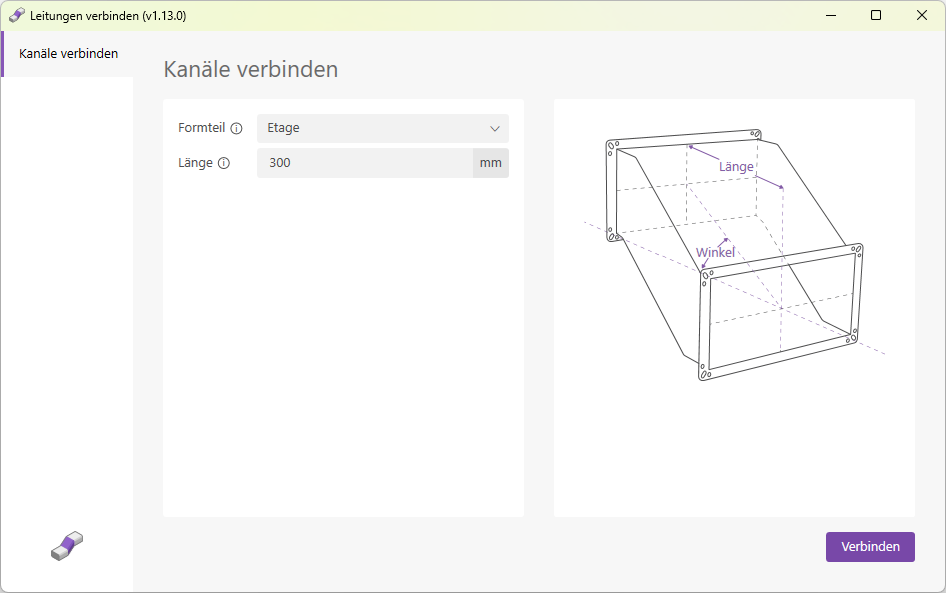
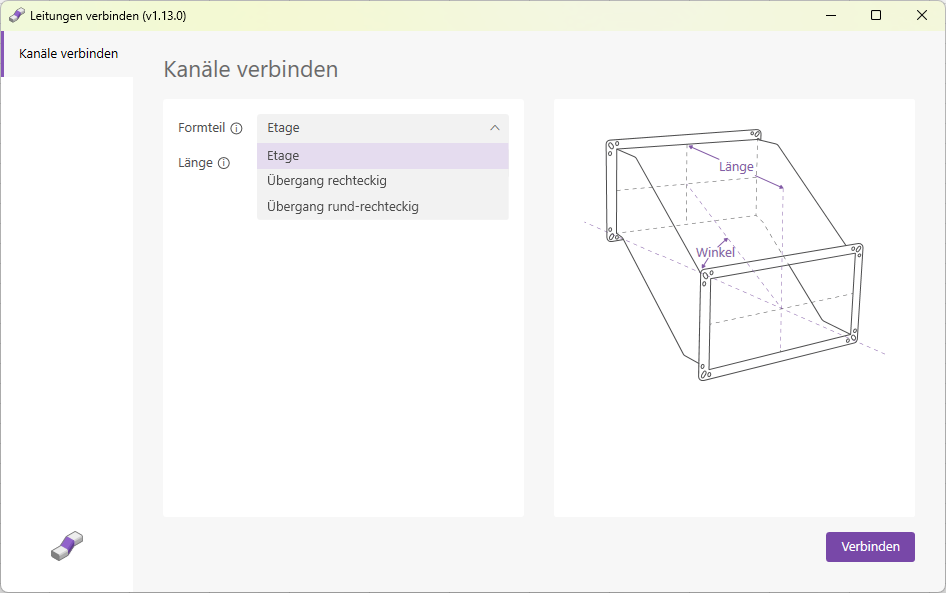
Connects rectangular ducts whose axes lie on different planes. The length of the fitting is specified in millimeters.
The following conditions must be met for the installation of floor fittings:
- The channels are at different heights
- The channels are not offset laterally; thus, when viewed from above, they run in a straight line
- The channels are the same width
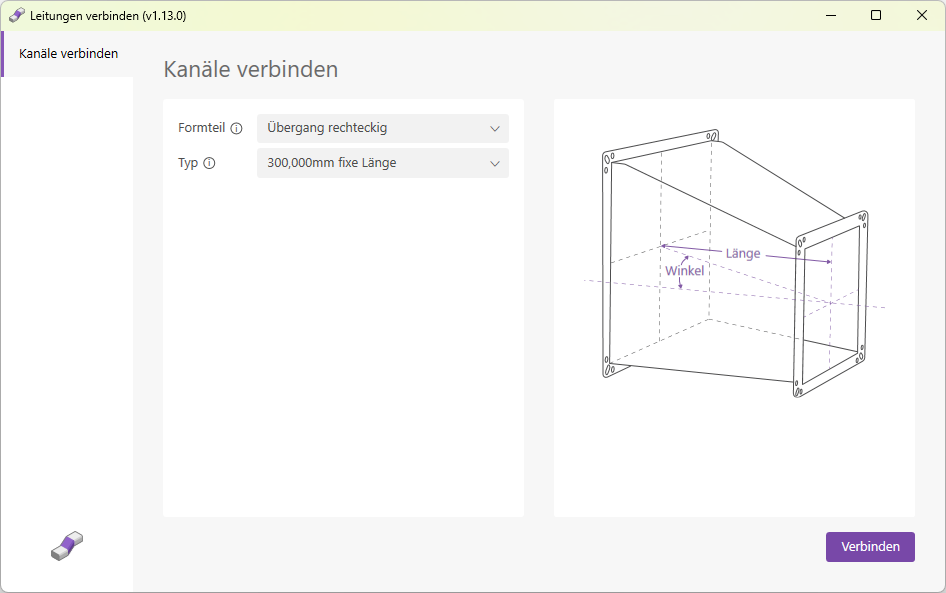
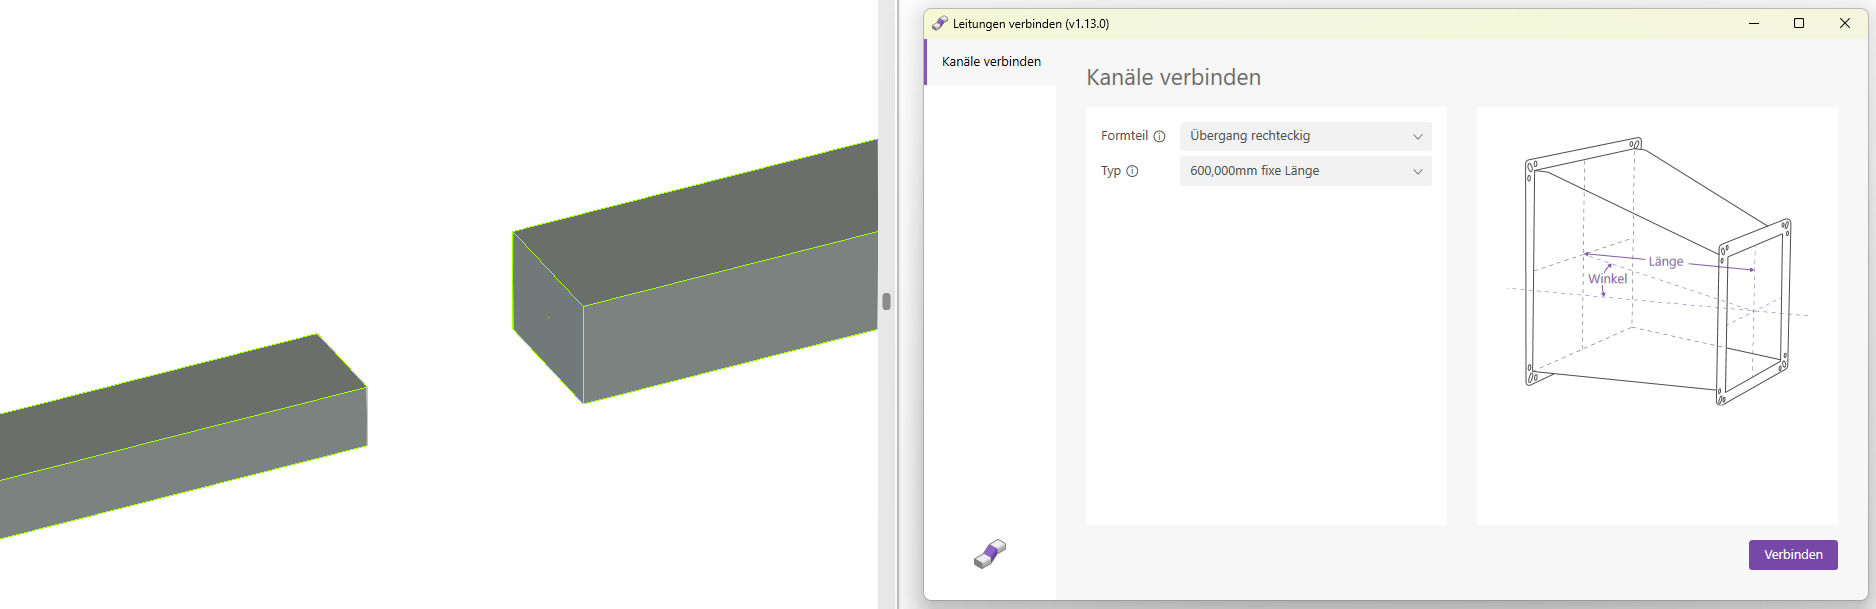
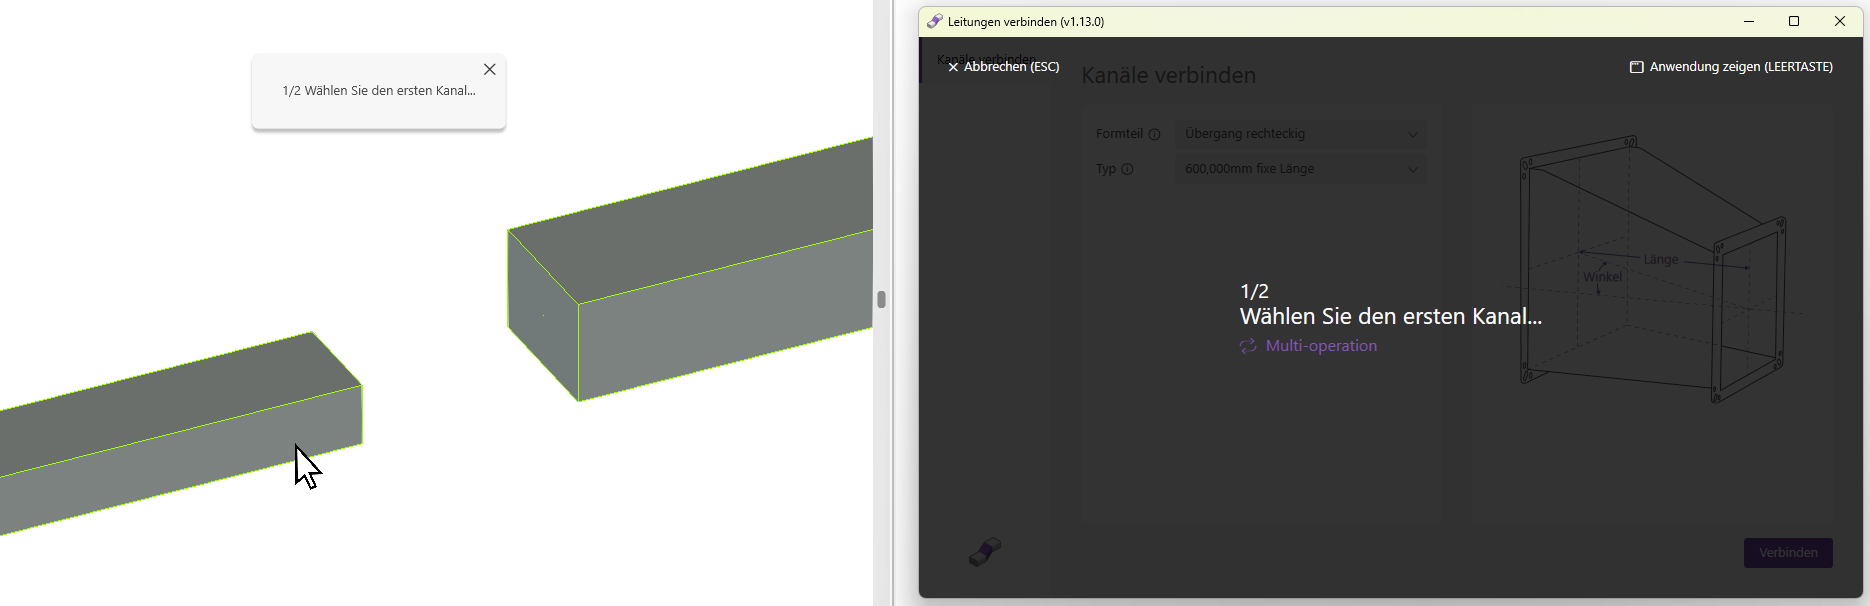
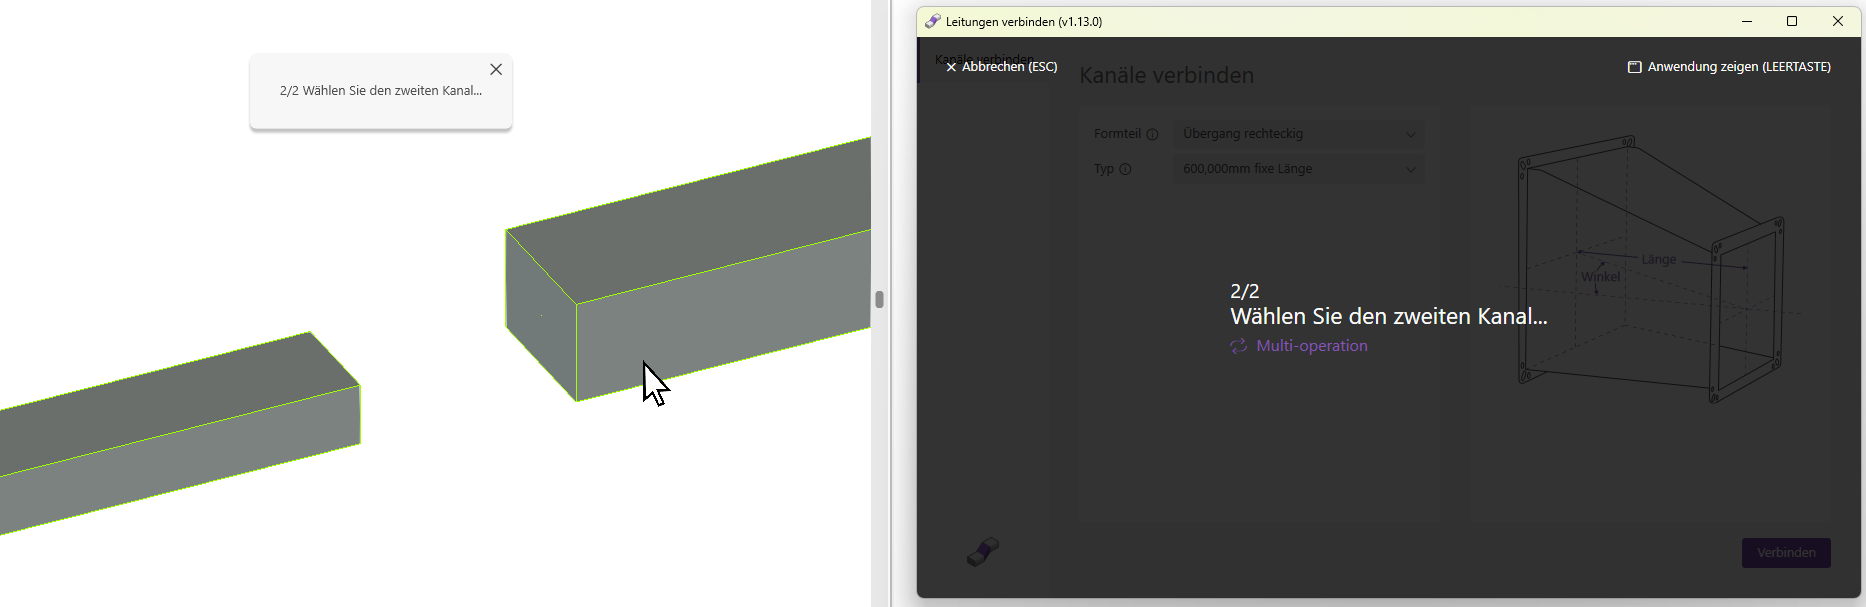
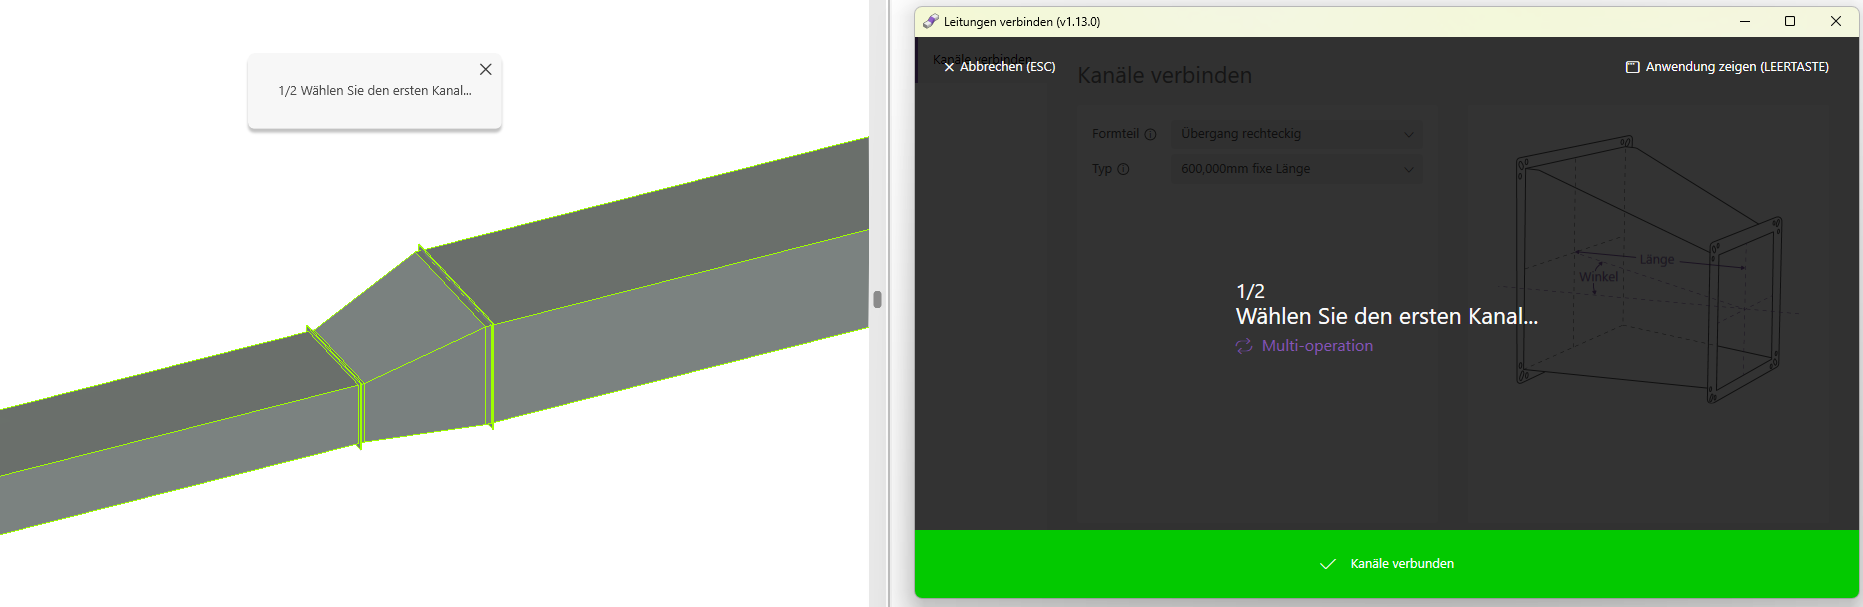
Connects rectangular ducts without any specific requirements regarding their alignment with one another.
This means:
- The channels can be at different heights
- The channels may be offset from one another laterally; thus, they do not have to lie on the same axis when viewed from above
- The ducts may have different widths and heights
Using the "Type" dropdown list, you can choose between two options:
- Type: Fixed Length
Select the fixed length of the fitting in millimeters; there are two options available (300 mm and 600 mm).
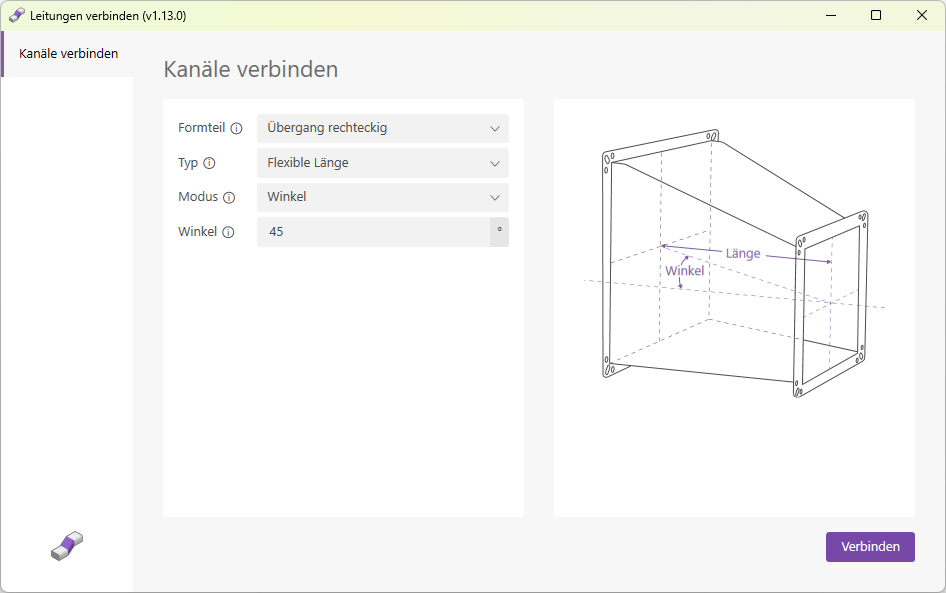
The "Flexible Length" connection type offers two different modes.
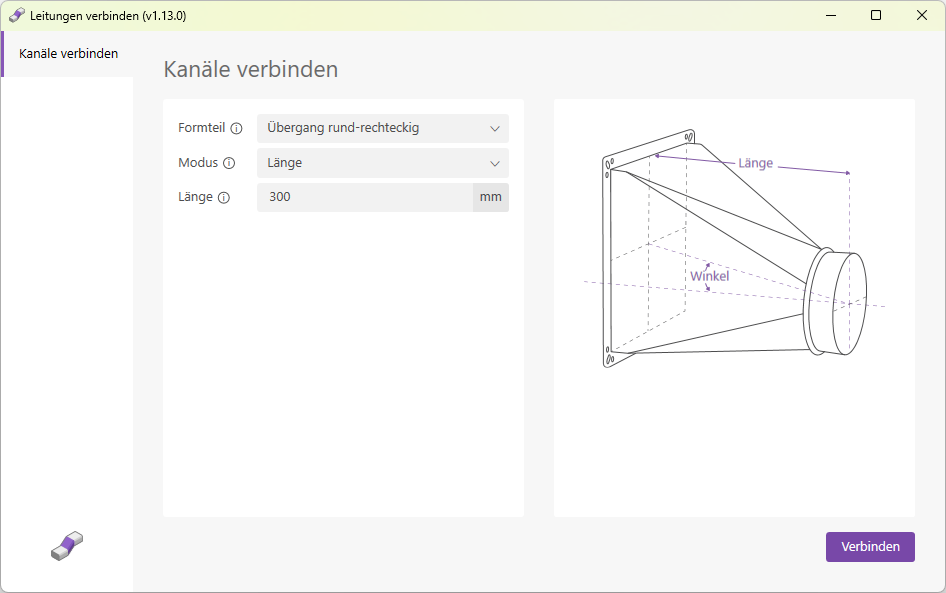
- Mode: Length
In this mode, the length of the fitting is specified in millimeters.

In this mode, the angle of the molded part is specified.
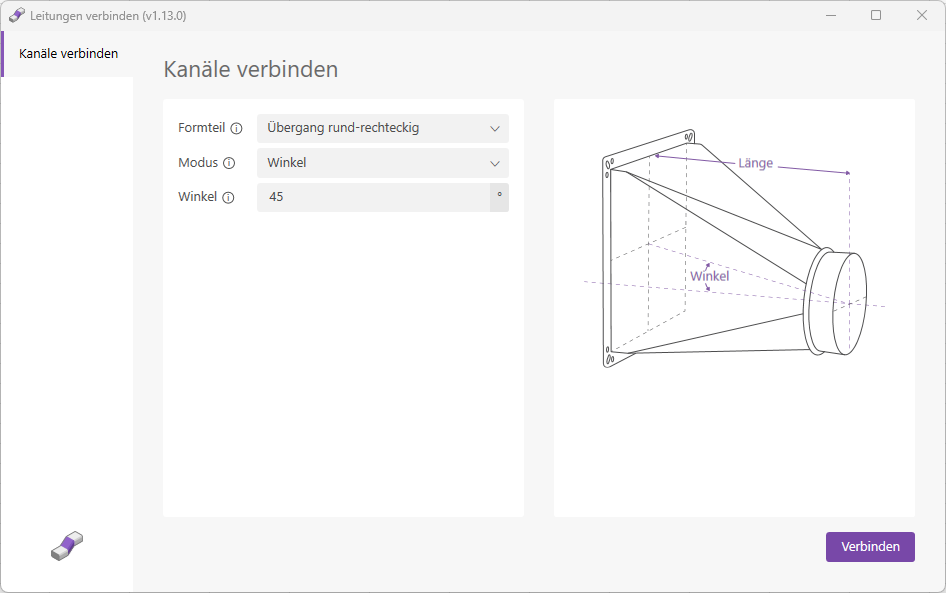
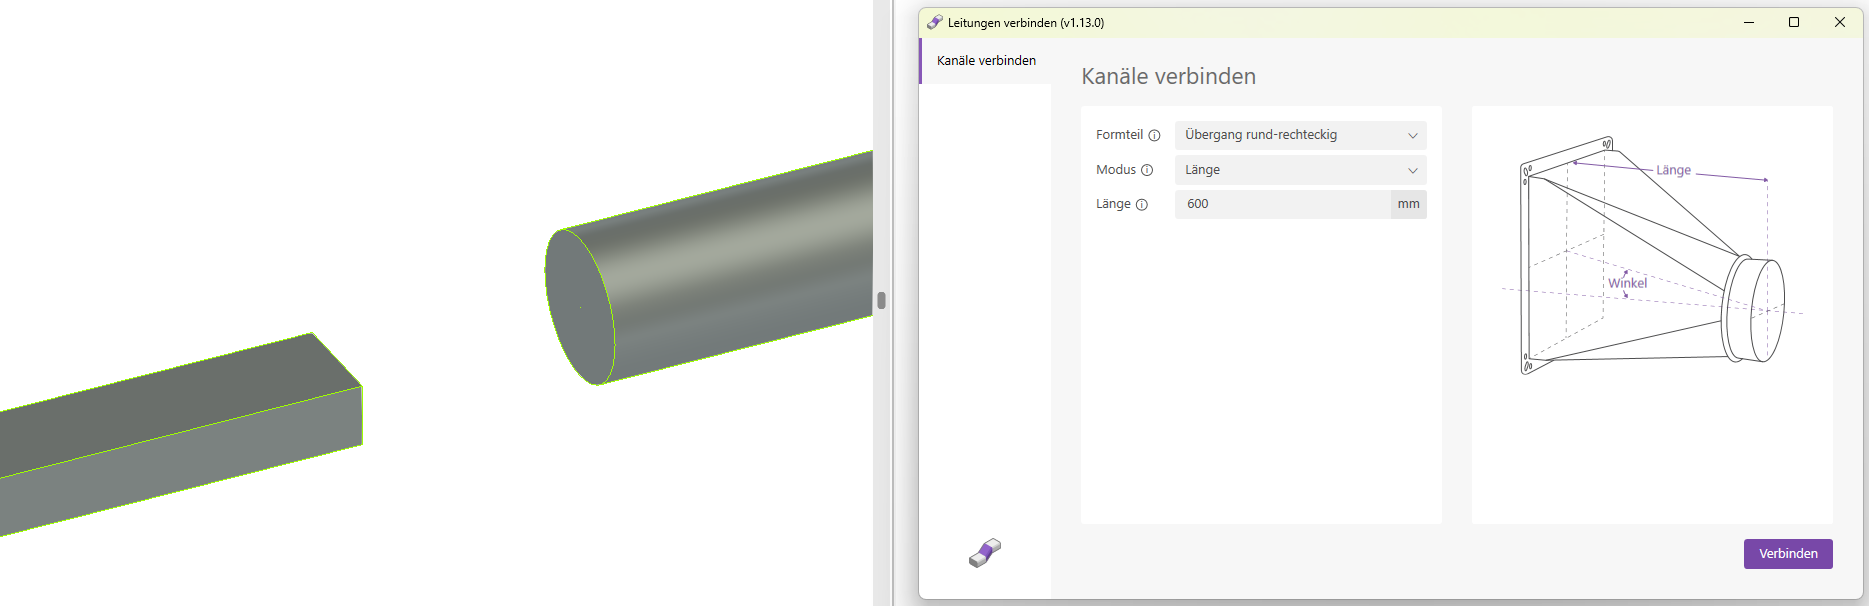
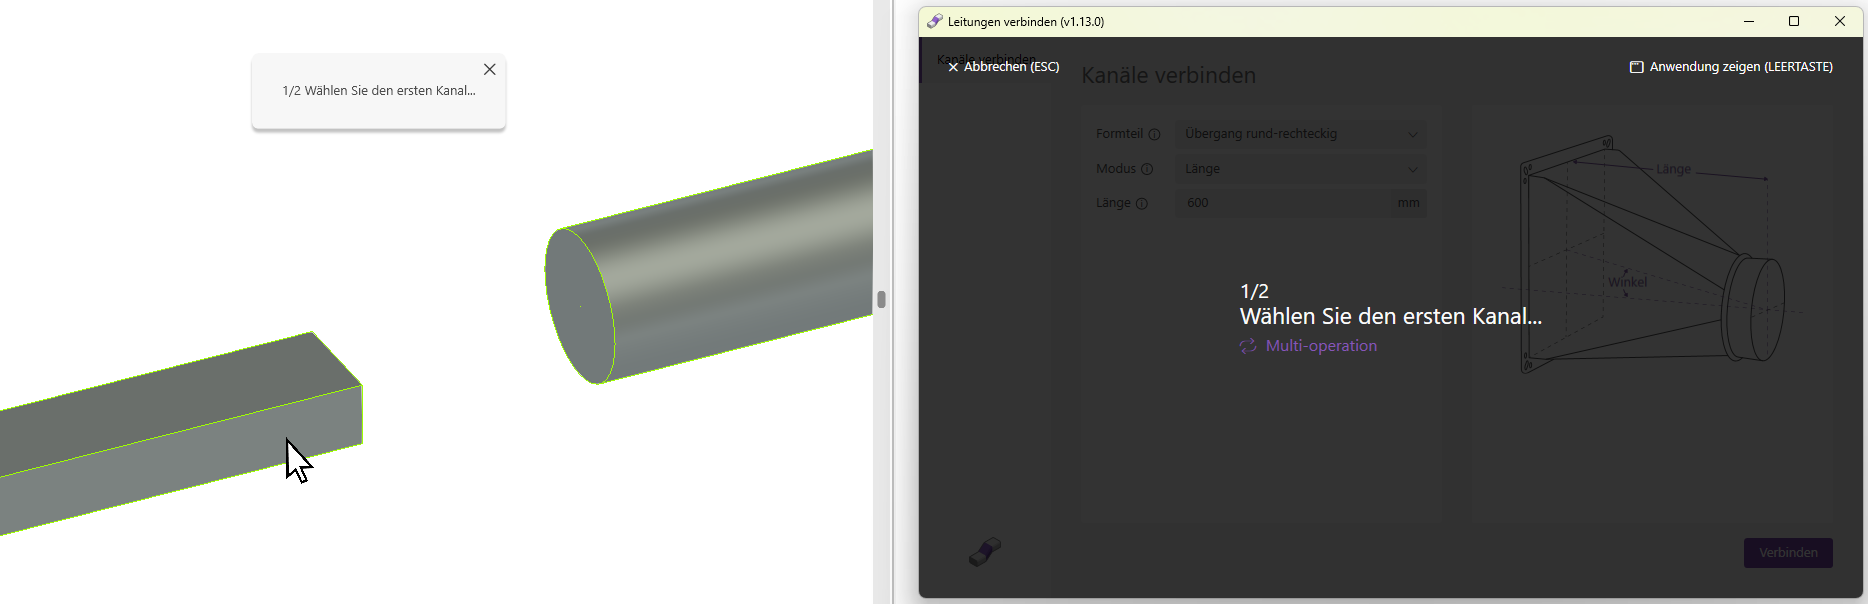
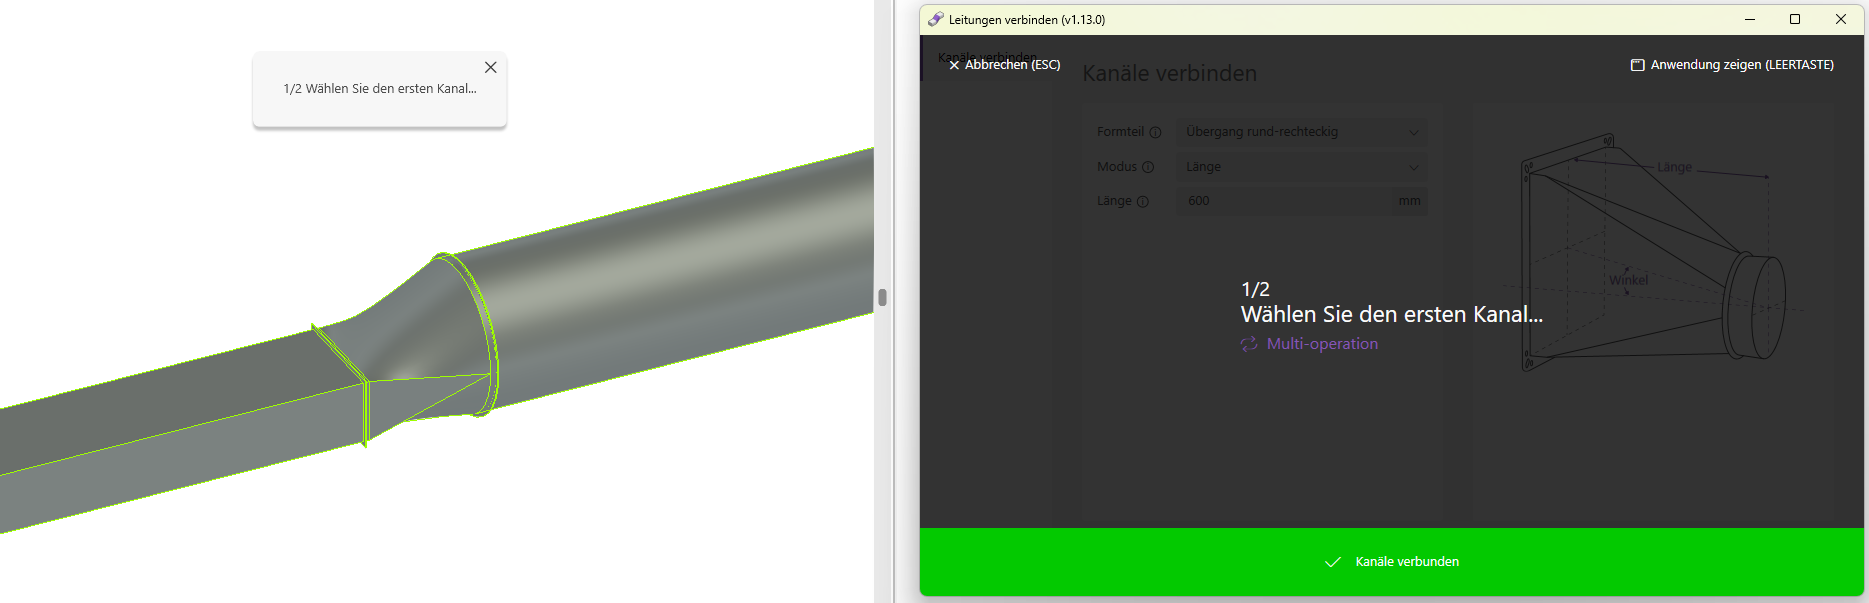
Connects a rectangular duct to a round duct.
Connects a rectangular duct to a round duct without any specific requirements regarding their alignment with each other. This means:
- The channels can be at different heights
- The channels may be offset from one another laterally; thus, they do not have to lie on the same axis when viewed from above
There are two modes available for sizing the molded part:
- Mode: Length
In this mode, the length of the molded part is specified in millimeters.
In this mode, the angle of the molded part is specified.
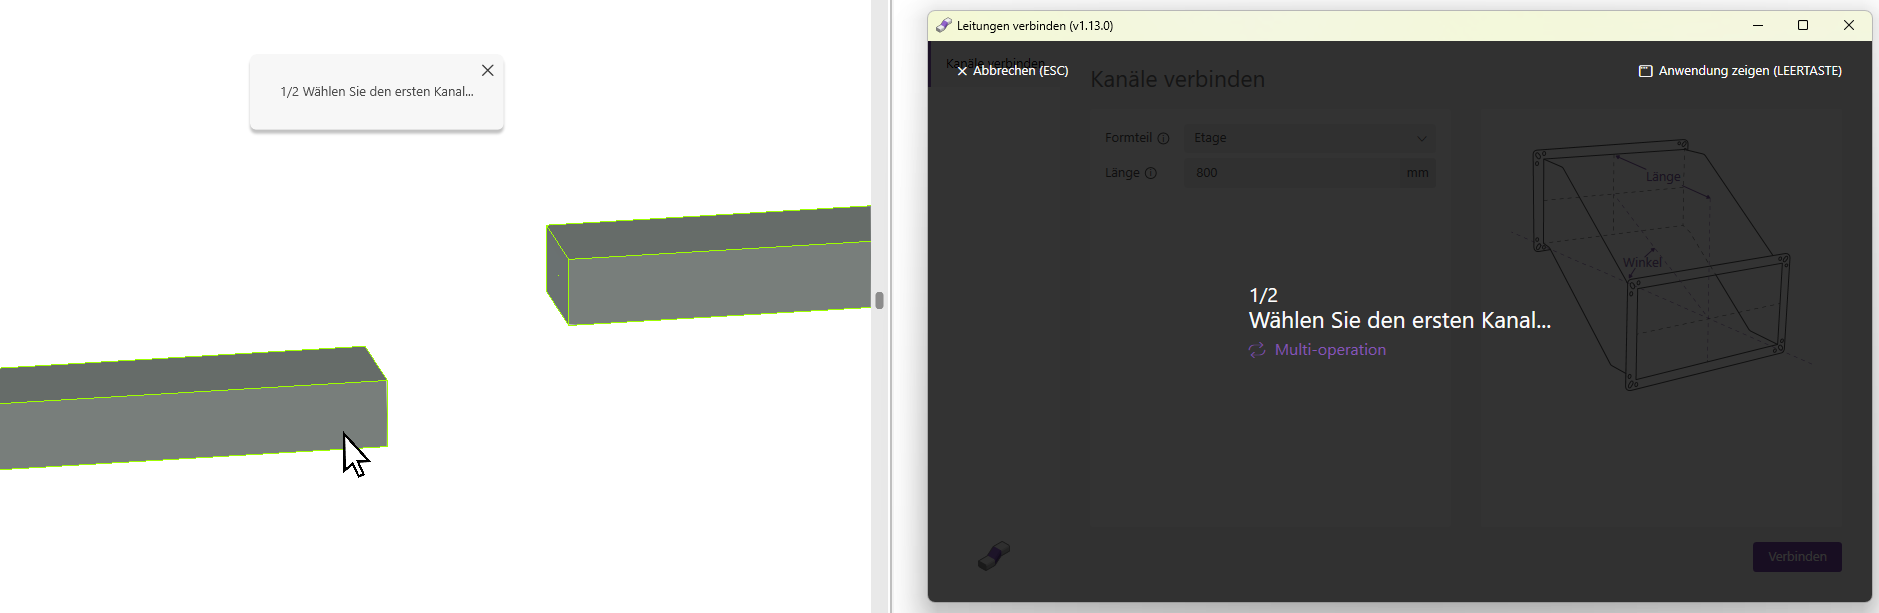
Connect channels
- Open any 2D or 3D view in which you want to select the conduits to be connected.
- Launch the add-in by clicking the "Connect Lines" button.
- Enter the desired length and click the "Connect" button.


- Select the desired type from the "Type" drop-down list and click the "Connect" button.
- Enter the desired length and click the "Connect" button.

1.15.0.0
- Revit 2026.0 through 2026.4 is now supported.
- The info icon opens the BIMpedia article.
- Pressing the F1 key opens the BIMpedia article.
- This add-in was developed for the transition floor families created by Plandata. Here you will find information on how to use Plandata Content.
If you have any problems or questions, or if you have ideas or suggestions, please feel free to contact our customer service team. We look forward to hearing your suggestions for improvement!

Unfortunately, this content is available only to our Pro users.
If you'd like to read the full article, try the Pro account or become a Pro user.