"Dimension Piping" allows you to adjust the dimensions of piping in building services design, thereby streamlining a time-consuming step in Revit. This feature enables you to resize piping systems, including all fittings contained within the run.
To load this content, you need to allow the YouTube service.
Resizing piping systems in Revit is tedious because the diameters of different piping components—such as pipes, fittings, and pipe accessories—cannot be adjusted simultaneously. Instead, each type of component in a piping system must be edited individually.

- Dimension pipes, fittings, and accessories simultaneously
- Selection-based workflow directly in the model
- Faster, more intuitive workflow
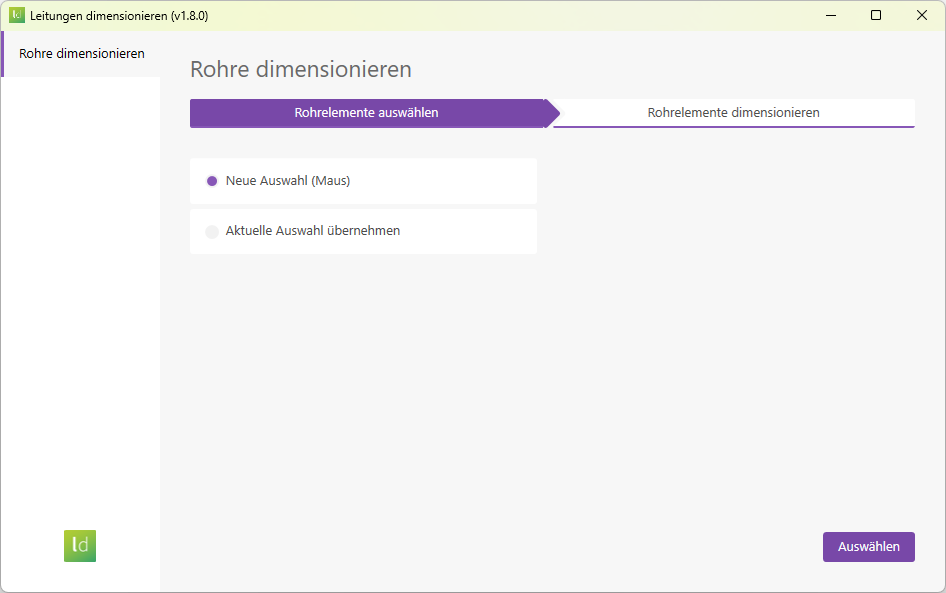
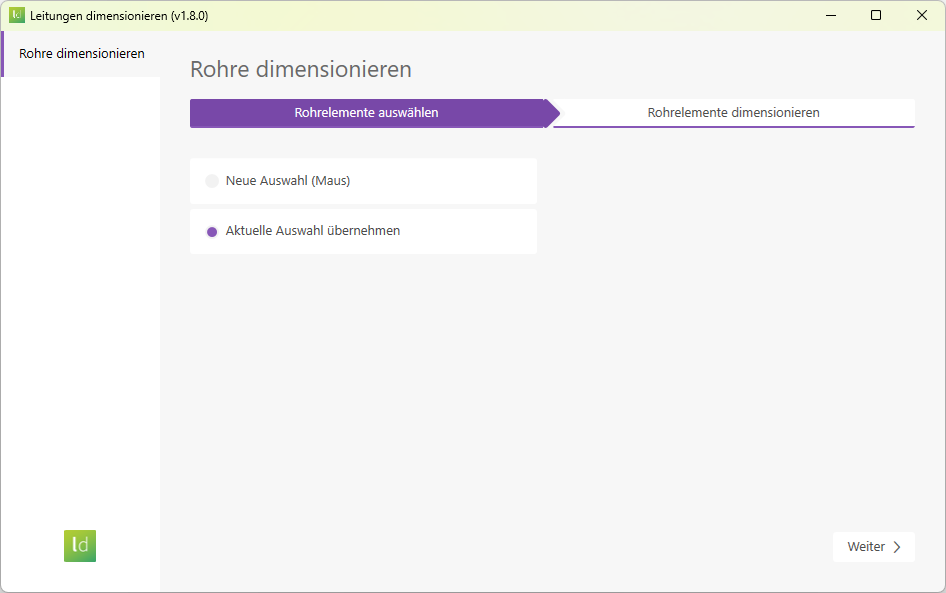
Select cables
In "New Selection" mode, the Revit command line is activated. You can now select pipes and pipe fittings in any view. Other categories cannot be selected in this prompt, which makes it easier to specifically select the relevant elements. The add-in’s user interface guides you through the selection process.
In "Apply Current Selection" mode, the add-in detects all pipe and pipe fitting elements currently selected in a Revit view. Elements from other categories are not included. If no elements are currently selected, the prompt opens instead, and you can make your selection.
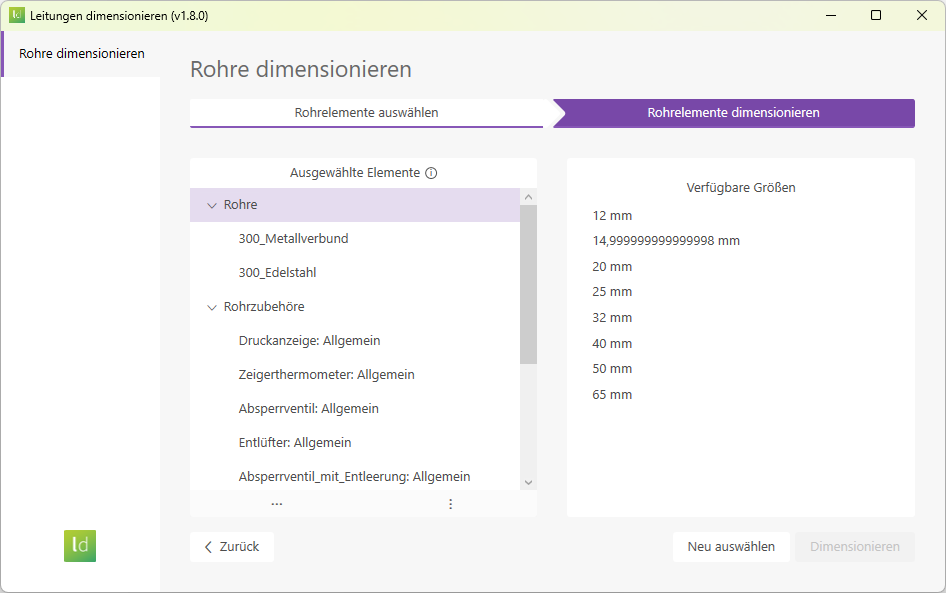
Sizing cables
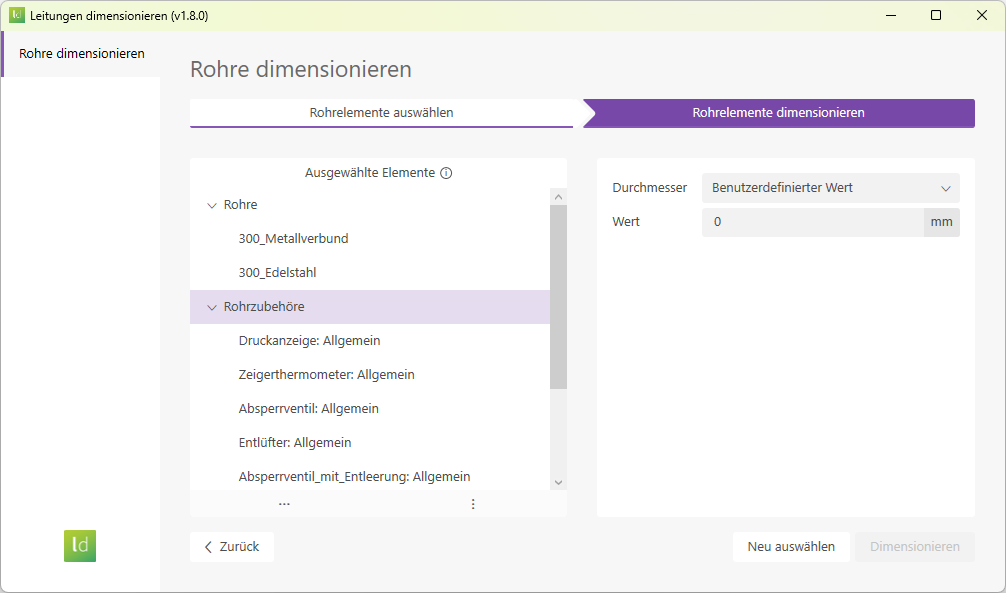
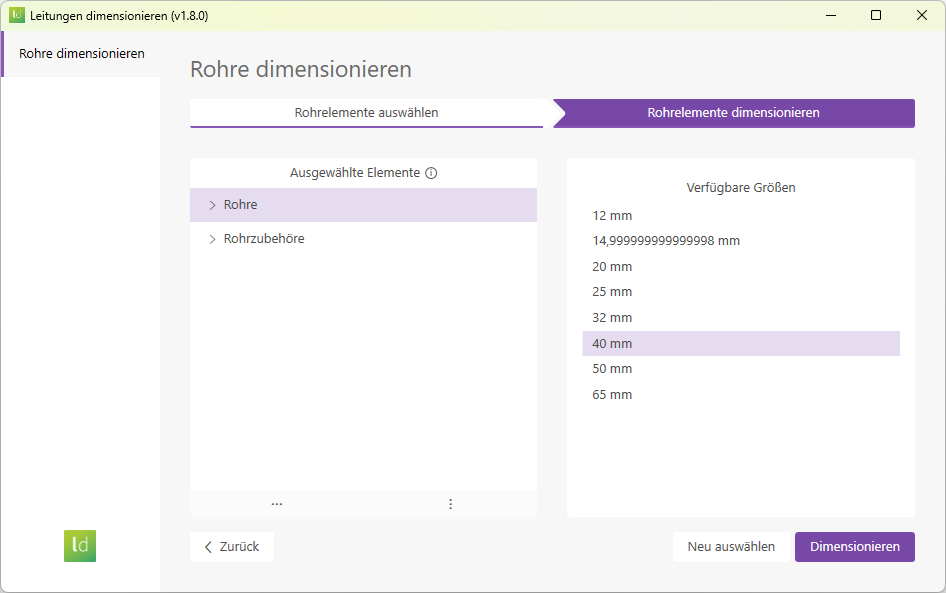
In the "Selected Elements" section, the elements are divided into two categories.
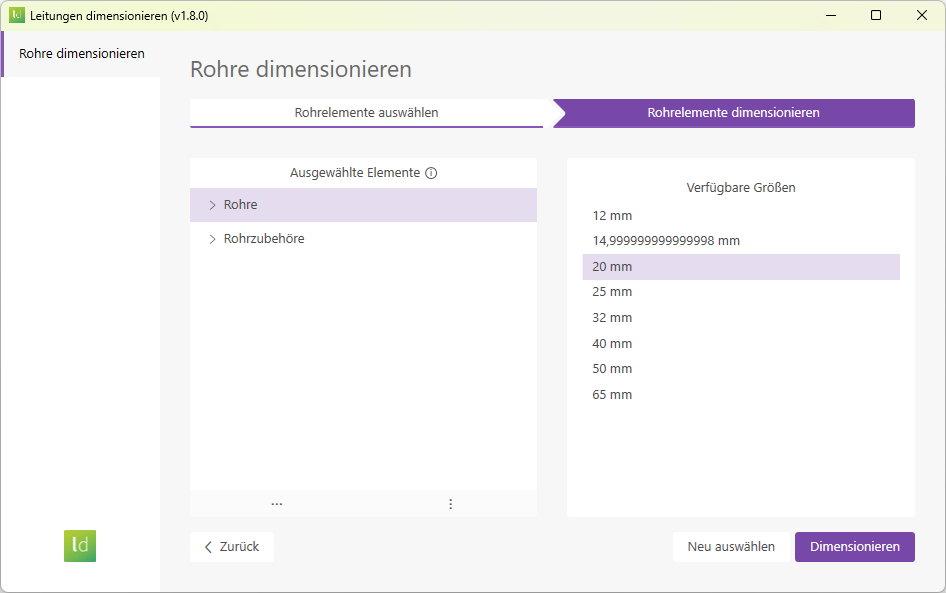
- Pipes:
Depending on your needs, you can either dimension all pipes for the selected elements or specify a particular pipe type. The available sizes correspond to the diameters defined in the system family.
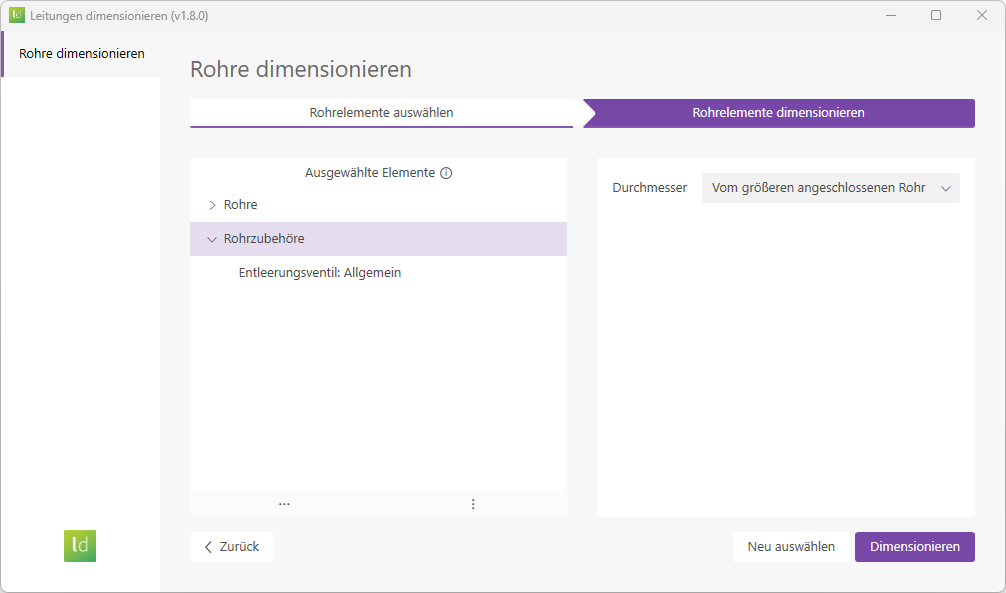
When dimensioning pipe fittings, you can either dimension all pipe fitting elements in the selection or specifically select a particular type of pipe fitting. There are two options available for dimensioning pipe fitting elements:
Select the size of the pipe fittings based on the larger diameter of the connected pipe.
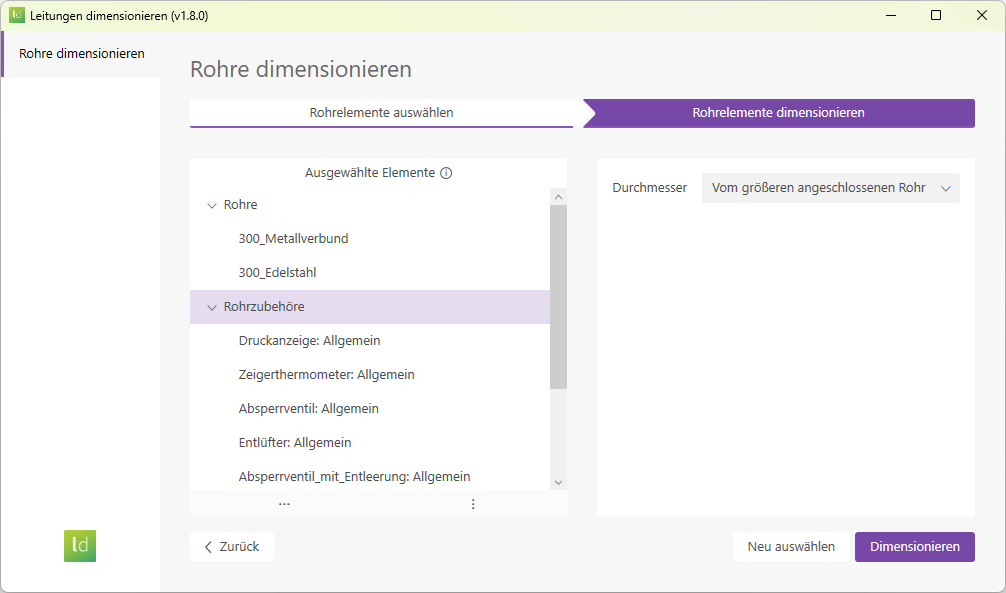
Dimension the pipe fitting components by specifying a custom value for the diameter.
Sizing cables
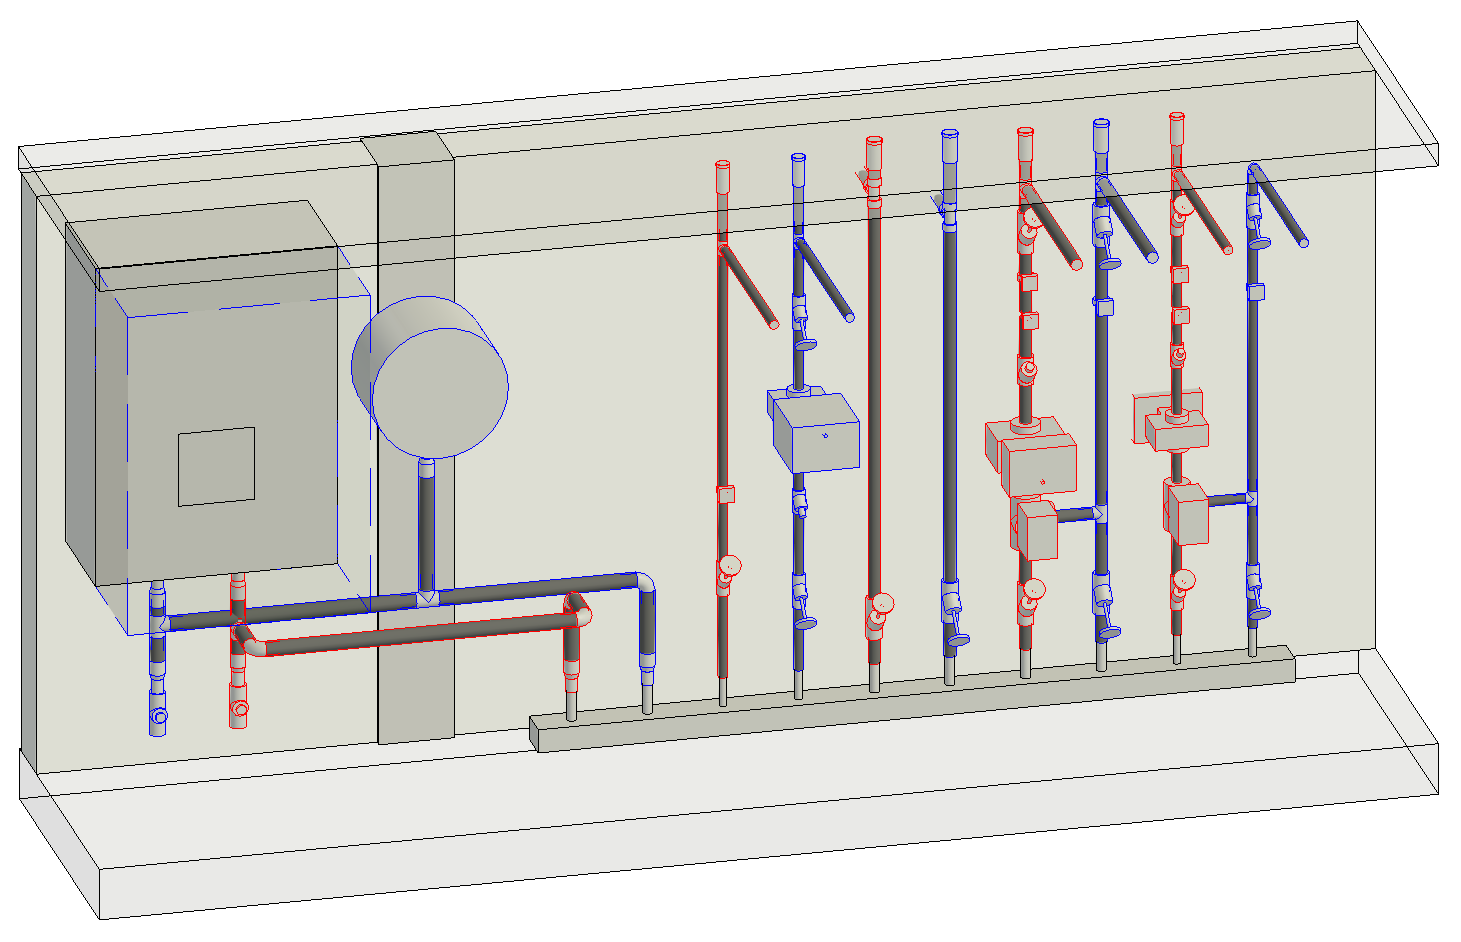
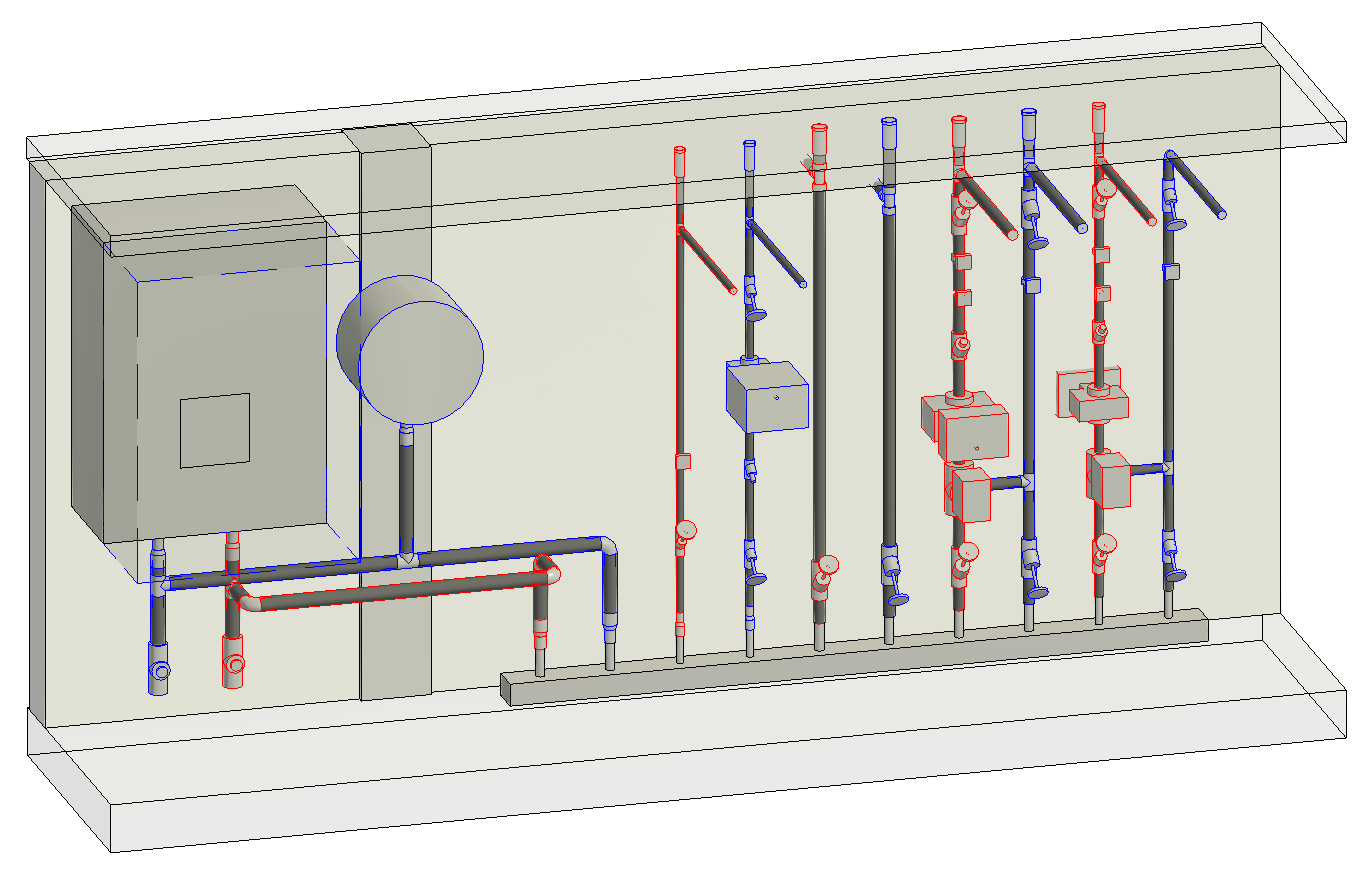
In this guide, we will look at the use case of resizing pipes on a boiler.
- Launch the add-in by clicking the "Dimension Pipes" button.
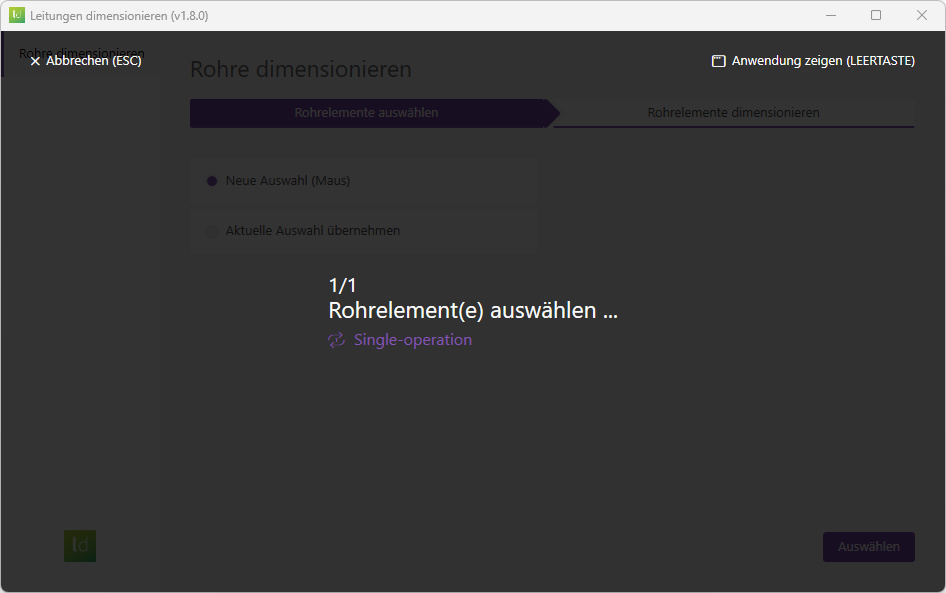
- Select the "New Selection" mode and click the "Next" button.
- The Revit command line will open; now drag a selection window over the elements you want to dimension. In this case, the command line only allows elements from the Pipes and Pipe Fittings categories. Ineligible elements cannot be selected.
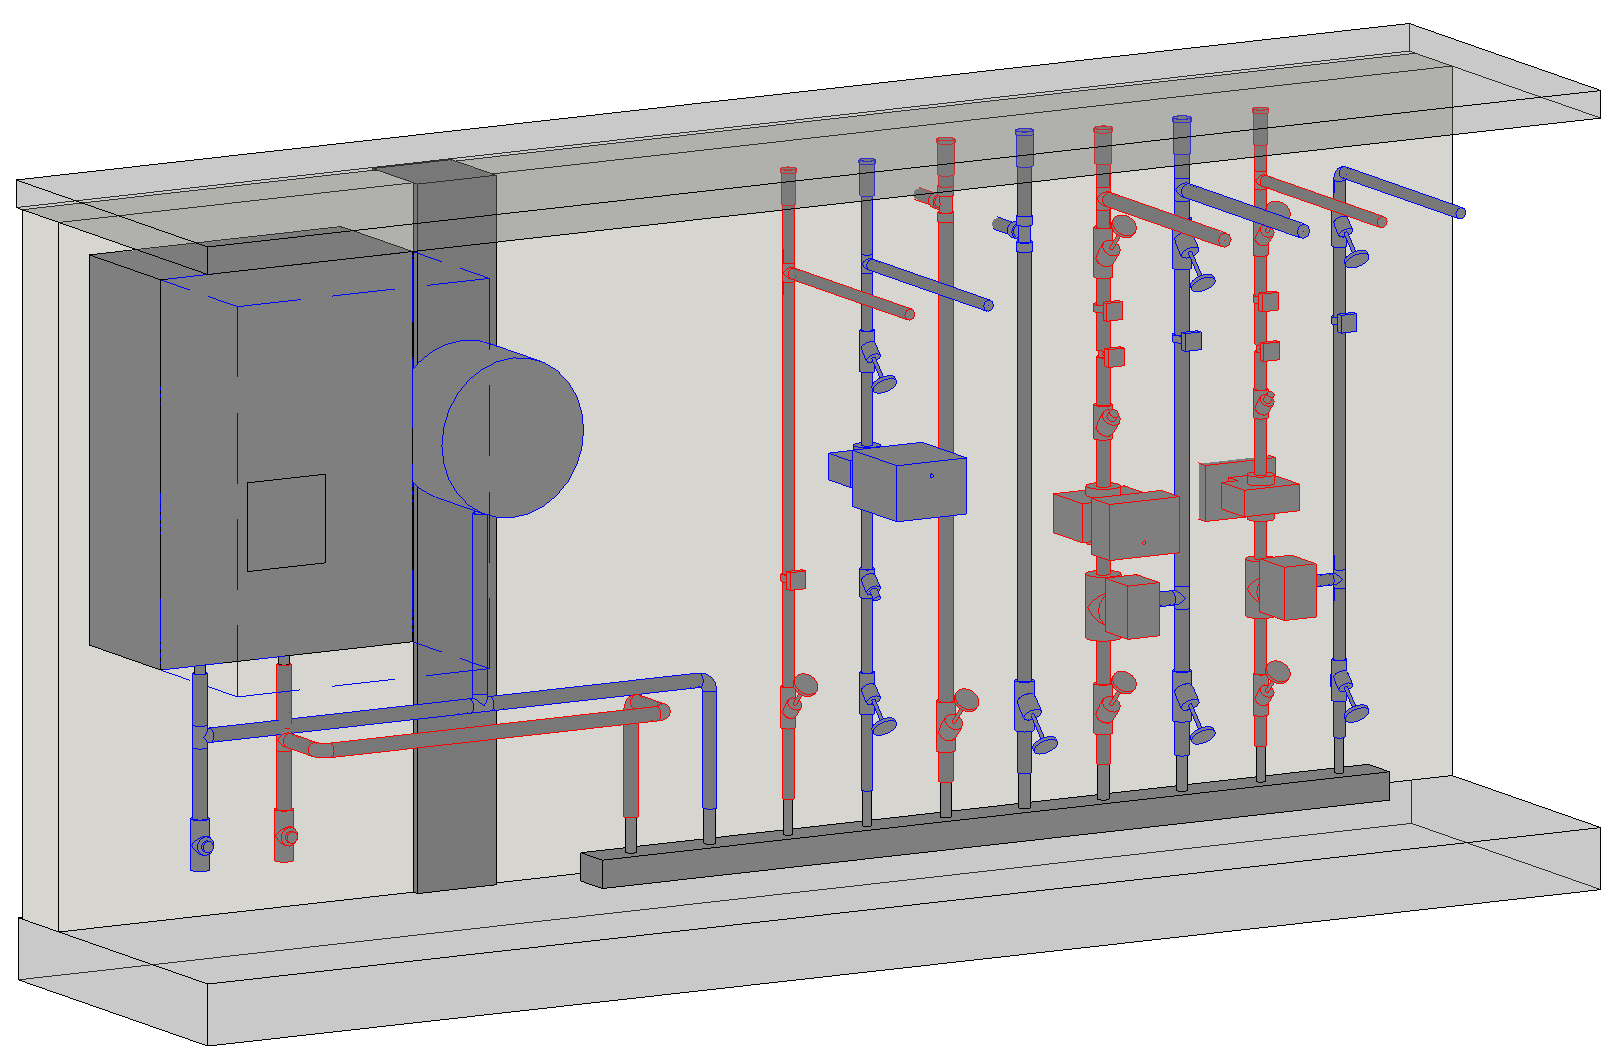
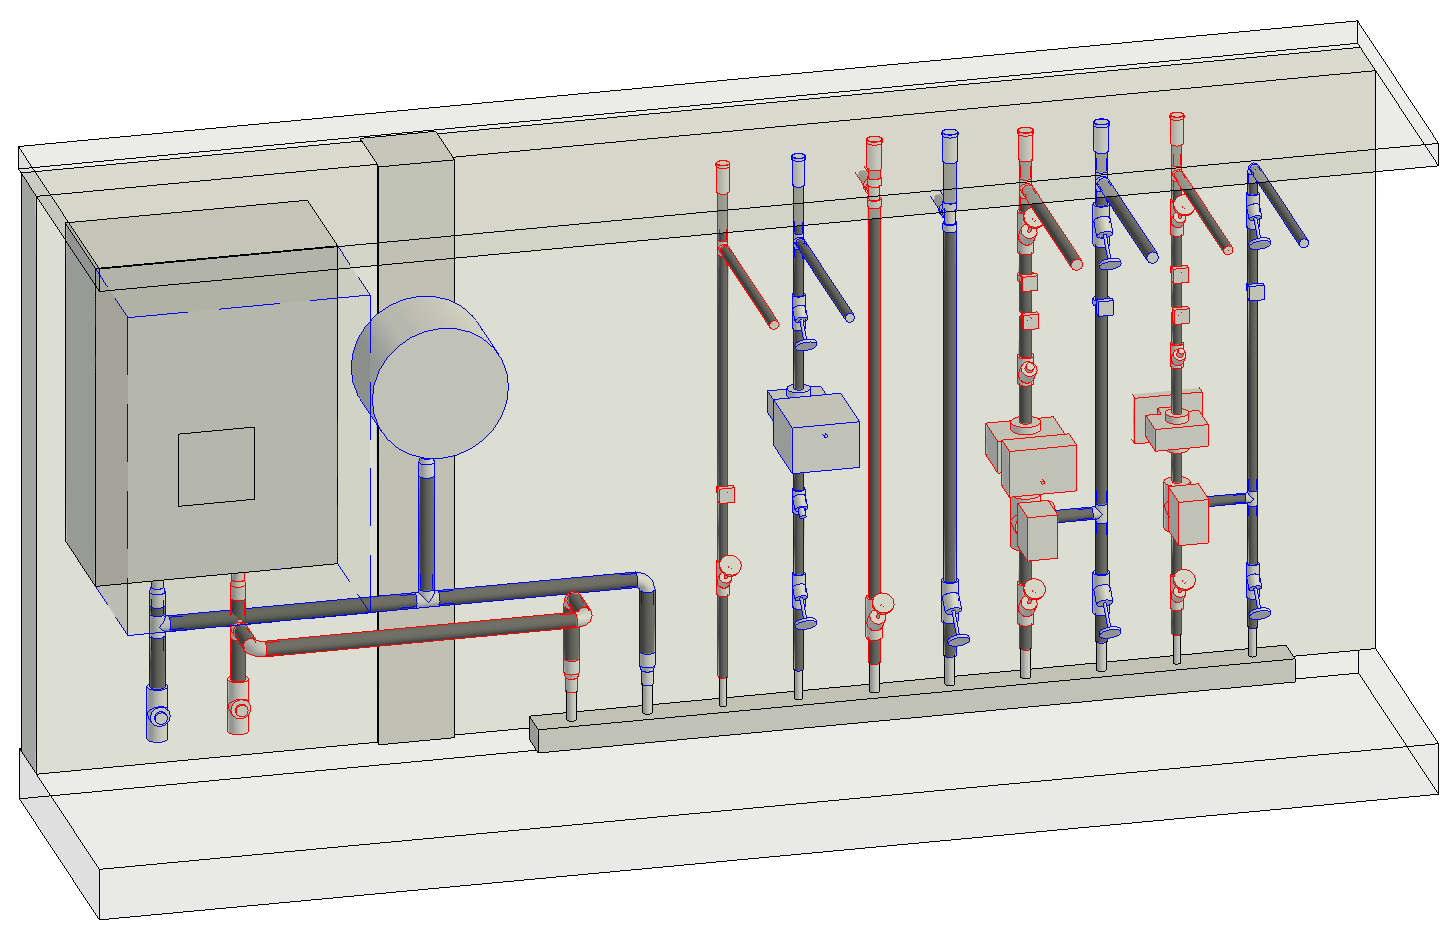
In our example, we’ll drag a selection box over the boiler’s supply and return lines.


- Select the piping elements in any Revit view. In this example, we will first select the entire supply and return lines—from the boiler to the manifold—in a 3D view.
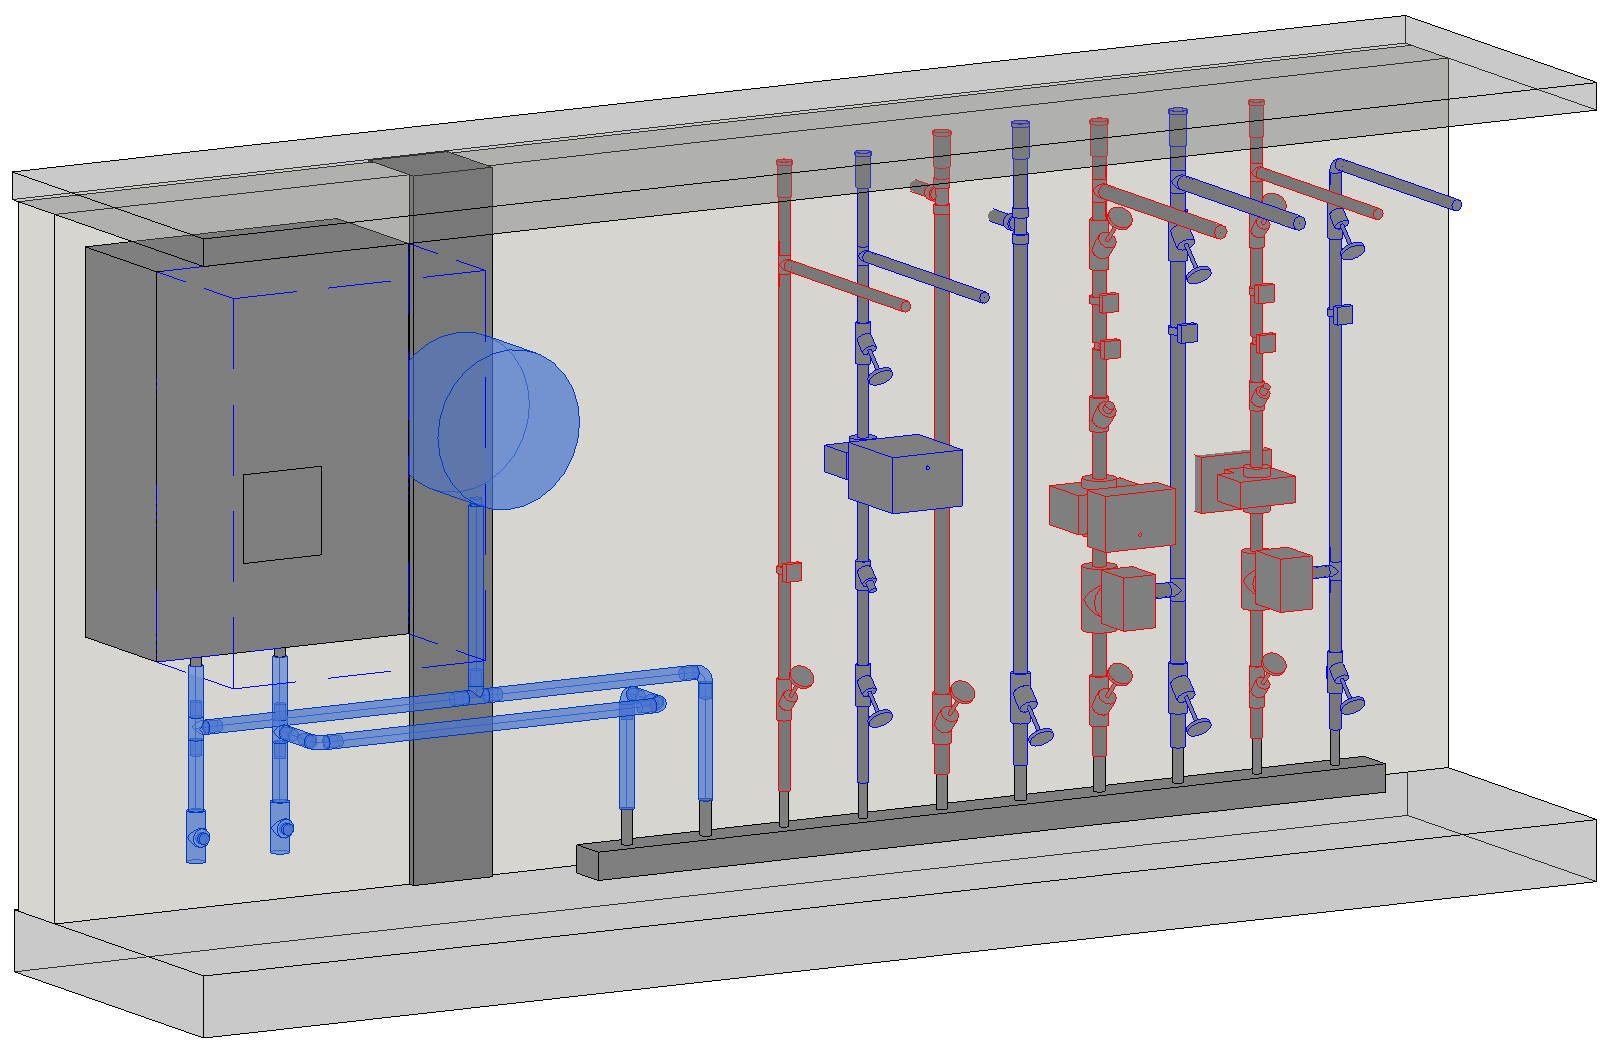
- We are now on the "Dimension Pipes" page. First, select the "Pipes" category, and then select the desired diameter. The pipes selected in our example have a nominal diameter of 35 mm; we will now select a diameter of 40 mm for the dimensioning.
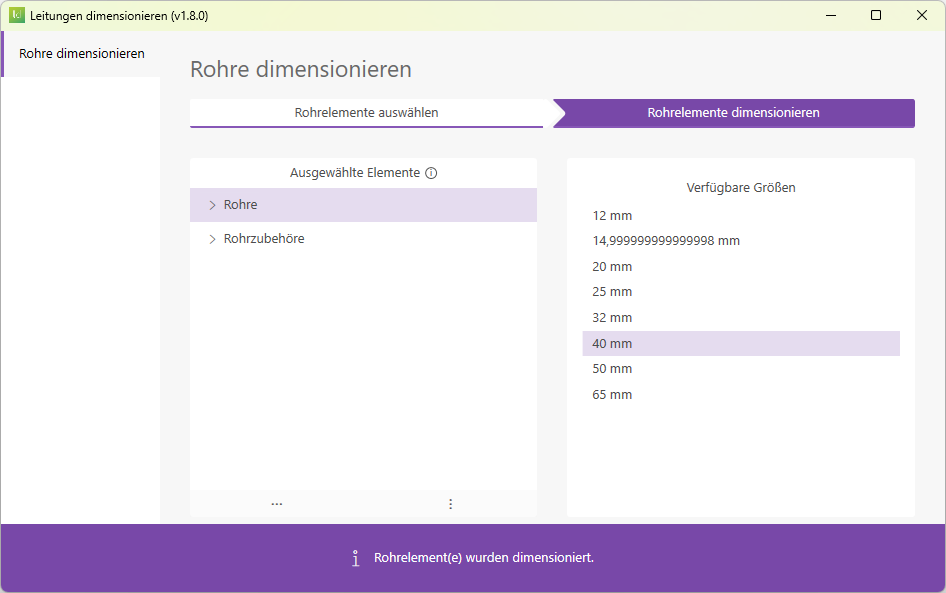

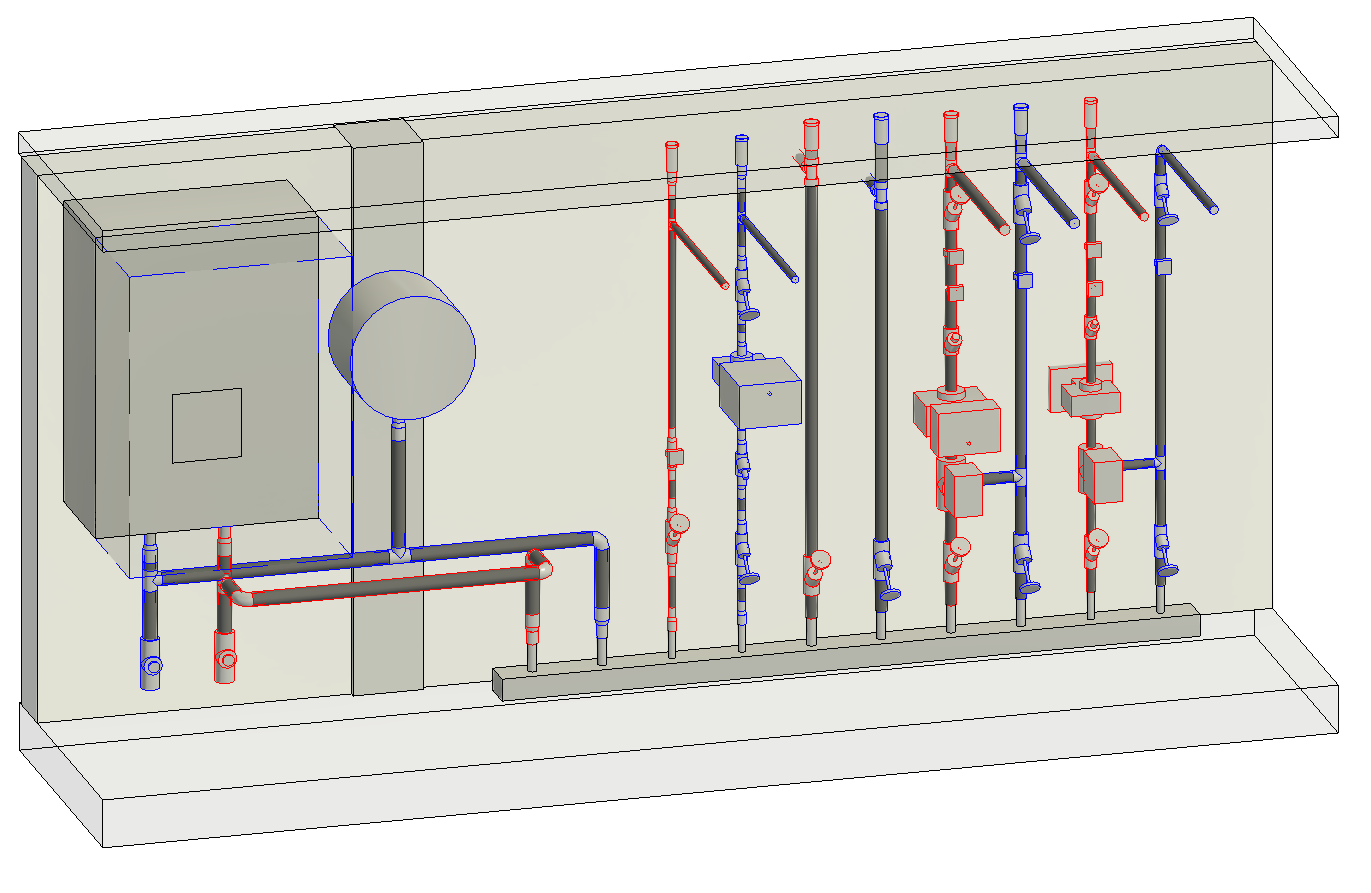
- The pipes and elbows were correctly sized to a diameter of 20 mm. Since the sizing of the pipe fittings will not take place until the next step, several reducers were added.
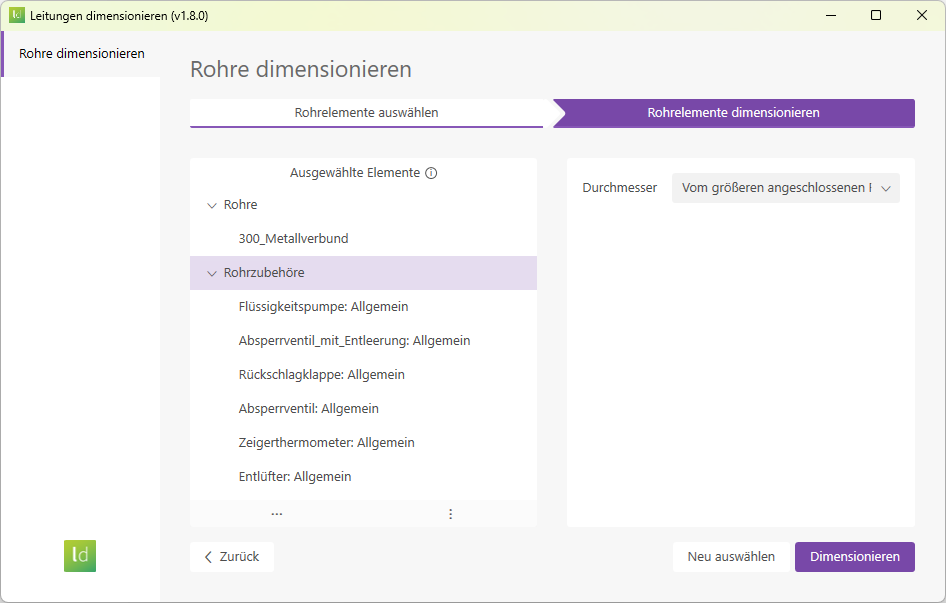
- Liquid pumps
- Shut-off valves
- Check valves
- Thermometers
- Air vents
Video
This video explains the most important features.
Note: This video does not show the latest version of "Dimensioning Pipes," but it still provides a good overview of the features. An updated video will be available soon.
To load this content, you need to allow the YouTube service.
1.10.0.0
- Revit 2026.0 through 2026.4 is now supported
- Pressing the F1 key opens the BIMpedia article.
- Dimensioning pipes and pipe fittings is a two-step process. Pipes are always dimensioned first, followed by the pipe fitting elements.
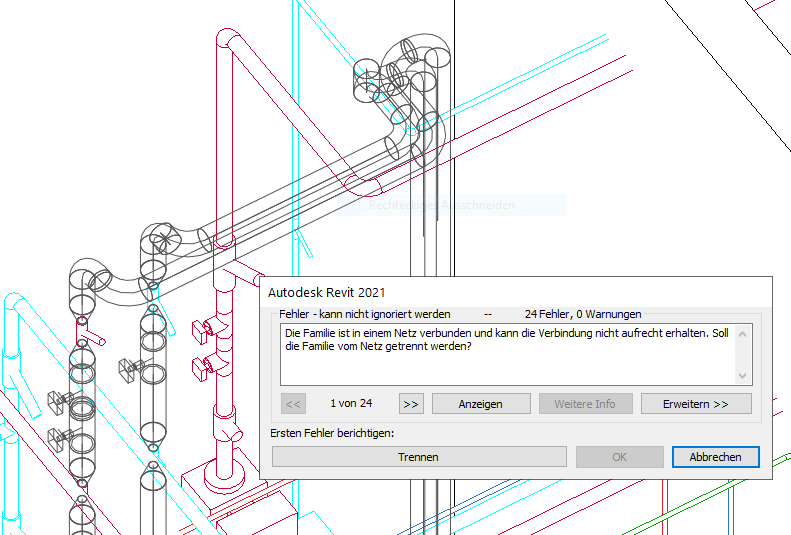
- If geometrically unsolvable conflicts arise during dimensioning (e.g., due to radii that are too tight or distances that are too small), Revit will display a corresponding error message and provide you with the option to correct the issue.
If you have any problems or questions, or if you have any ideas or suggestions, please feel free to contact our customer service team. We look forward to hearing your suggestions for improvement!